
The Update Dashboard provides administrators with a centralized interface for monitoring and applying updates to the MSPControl system. This tool ensures that all servers remain on the same version, which is critical for stable and predictable operation. Before any update can be performed, Maintenance Mode must be enabled. This prevents end users from interacting with the system during update operations and safeguards against incomplete or inconsistent installations.
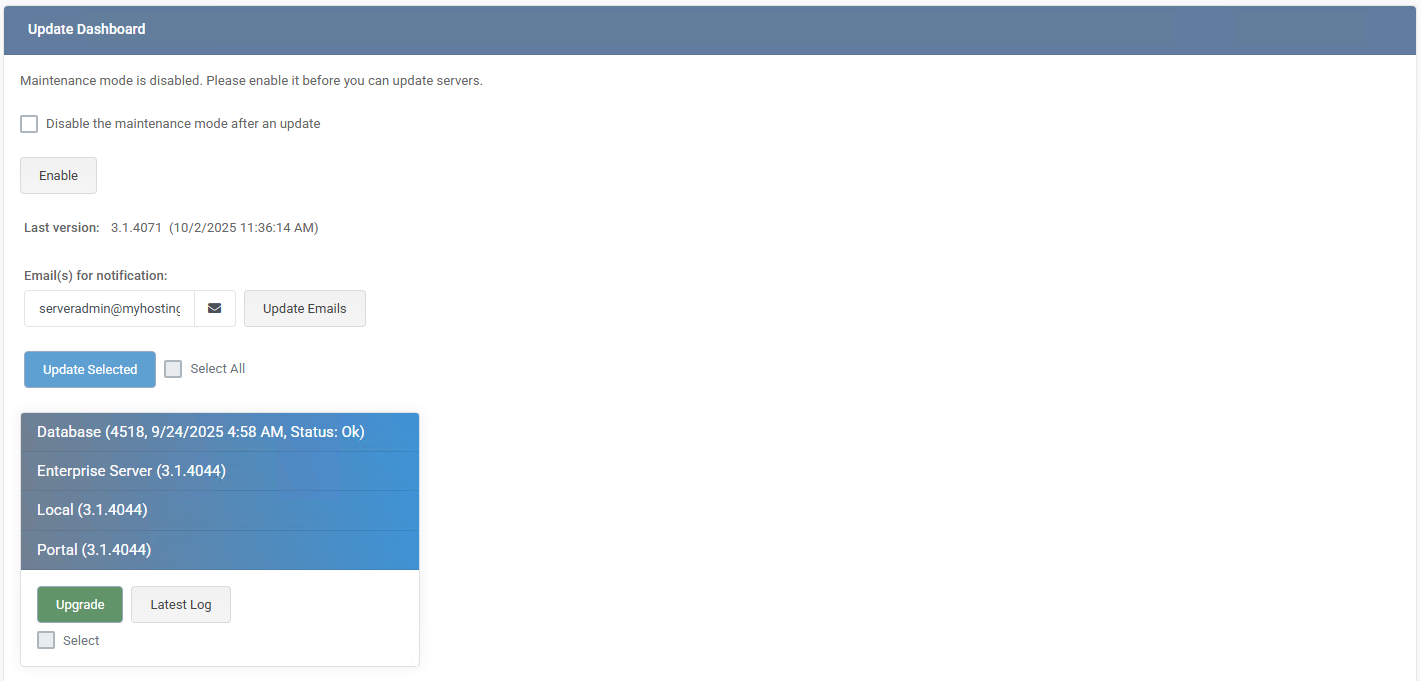
Update servers or task name UPDATE_SERVER_WITH_SCHEDULER.In the initial state, Maintenance Mode is disabled. Administrators see a notification that updates cannot proceed until Maintenance Mode is enabled. Buttons such as Upgrade, Update Selected, and Select are inactive until this requirement is met.
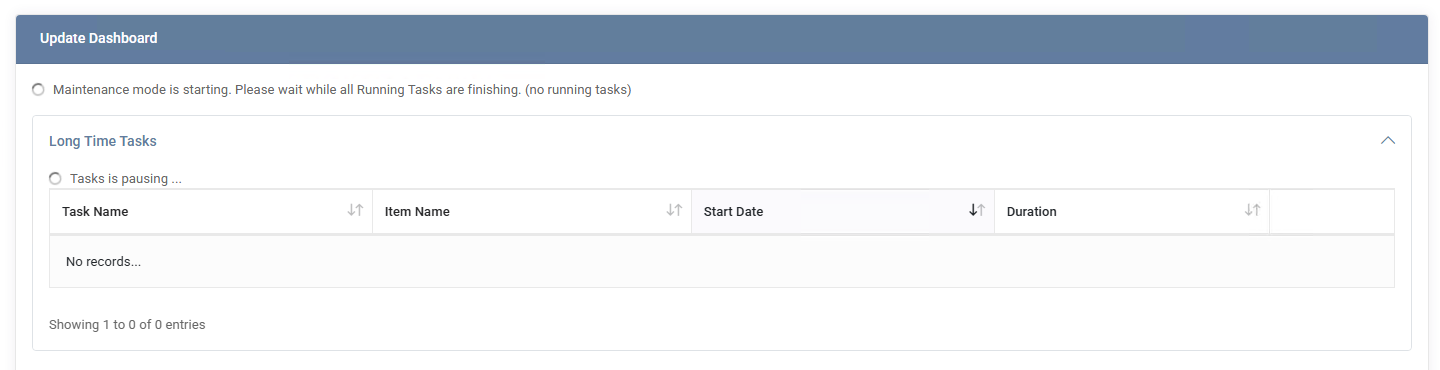
Click Enable to start Maintenance Mode. The dashboard displays a progress banner indicating that the system is pausing tasks. The Long Time Tasks panel shows items that must finish or be paused before updates can begin. While this handshake runs, update actions remain unavailable.
When Maintenance Mode is active, the header shows Maintenance mode is enabled. You can optionally check Disable the maintenance mode after an update to automatically restore user access once the upgrade completes. The Cancel Maintenance Mode button immediately exits maintenance if needed.
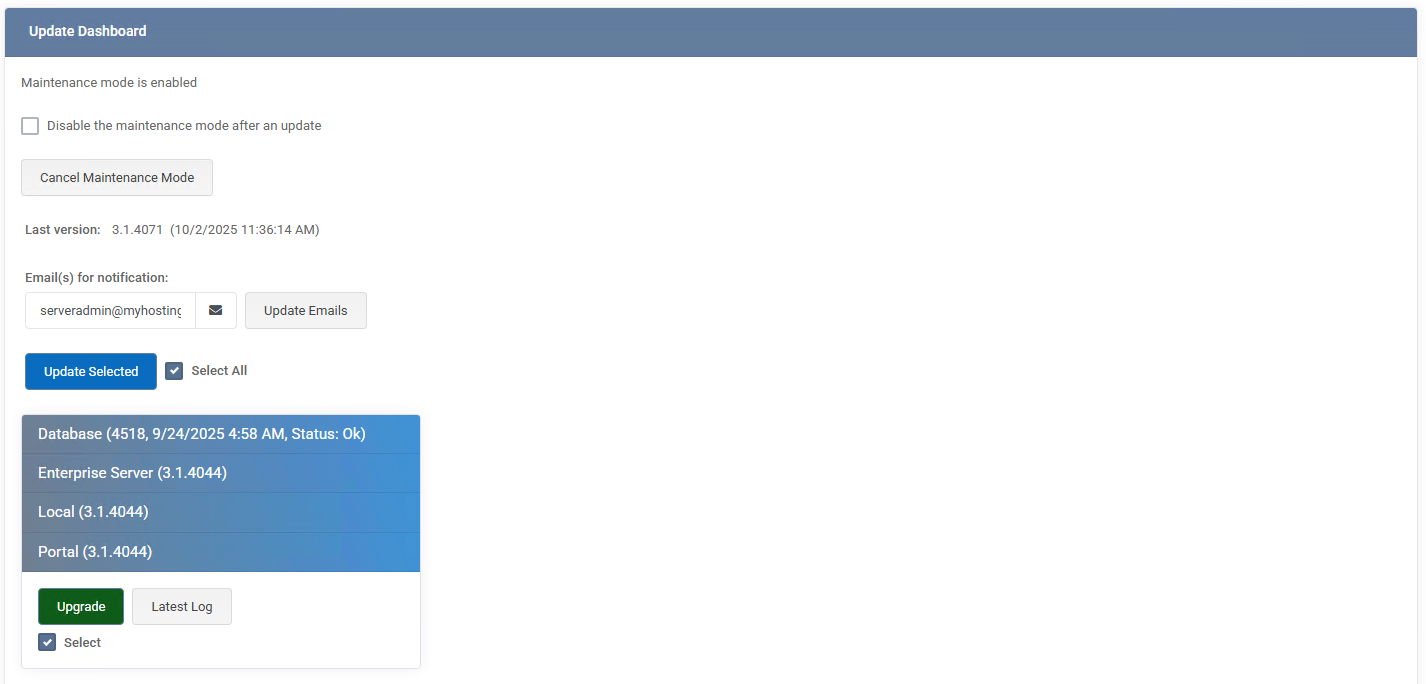
Use the server list to choose what to upgrade: Database, Enterprise Server, Local, and Portal. You may select specific items via the Select checkbox under each tile or use Select All to target every component. The Latest Log button opens the last installation log for the highlighted component.
Click Update Selected to upgrade all currently selected components or press the green Upgrade button on an individual component to update it alone. A status message appears (Server update has been successfully started) and the page shows a spinner with Update is in progress. During execution, the Force Stop button becomes available for emergency termination.

Use the Email(s) for notification field to set one or more recipients for progress and result emails, then click Update Emails. This is useful for tracking unattended or overnight maintenance windows.
The Latest Log button shows the most recent installation log for a selected component. If the log is older than three days, retrieve it from the Audit Log using the event name Update servers or the task name UPDATE_SERVER_WITH_SCHEDULER. Logs are essential for diagnosing failures and confirming successful version alignment.
After the update finishes, the Maintenance mode status returns to disabled (if the option Disable the maintenance mode after an update was checked). All update actions become available again, and the system shows the latest version number under Last version.
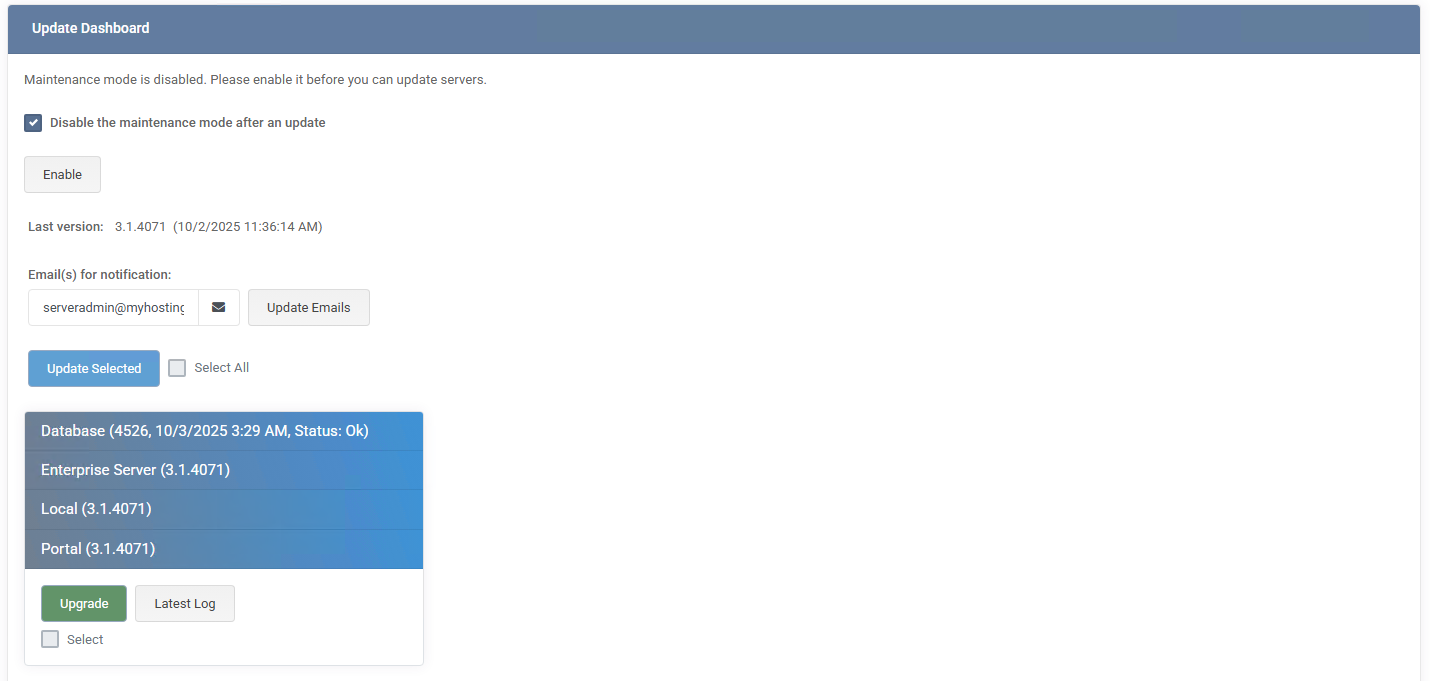
The server tiles update to reflect their current build numbers and status. For example, the Database component shows the latest applied build number and the timestamp of the last update (Status: Ok). Each component tile can be individually checked to verify that all items were successfully upgraded.
From this screen you can once again:
This completes the standard update cycle: enable maintenance, select servers, perform upgrade, and confirm results.
Following these practices ensures smooth upgrades, prevents version mismatches, and keeps MSPControl fully stable and reliable.
No credit card required for free, limited license.