Photos
The Photos section in MSPControl lets you store, organize, and share images within the platform.
It includes four default albums (Servers, Computers, Infrastructure, and Assets), but you can also create your own. Each album can be protected by authorization requirements and peer-based access, ensuring that sensitive images are only visible to approved individuals.
Enabling Photos & Azure Blob Setup
Before you can upload or manage photos, you must enable the feature and configure Azure Blob storage:
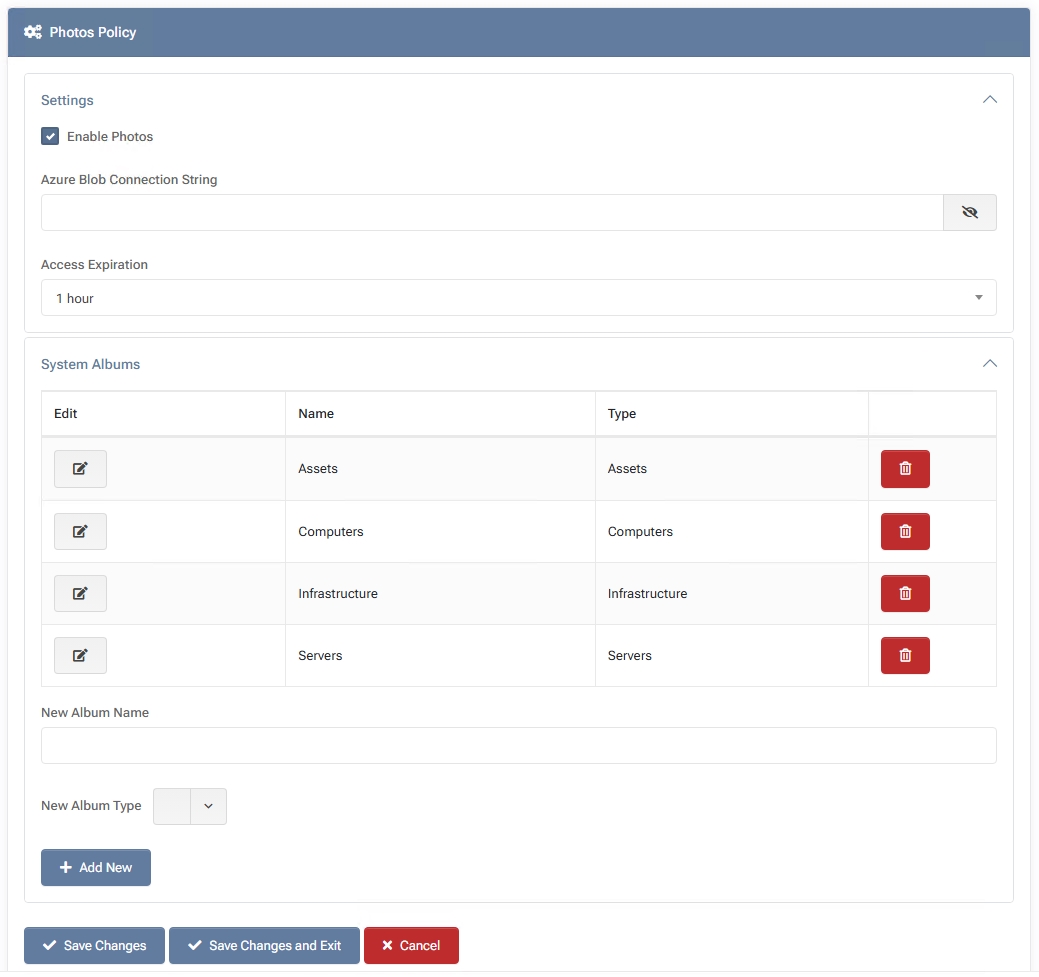
- Go to Settings > Policies > Documentation > Photos Policy
Here, check Enable Photos to turn on the feature.
- Provide an Azure Blob Connection String
In the Azure Blob Connection String field, enter the connection details for your Azure Storage Account.
MSPControl will use this for storing and retrieving uploaded images.
- Set Access Expiration (Optional)
Define how long peer access to photos lasts by default (e.g., 1 hour, 1 day). You can override this per album or image.
- Click “Save Changes”
Your configuration is now active. The Photos section should appear in the Documentation menu.
Without enabling Photos and providing a valid Azure Blob connection string,
the Photos functionality will be unavailable.
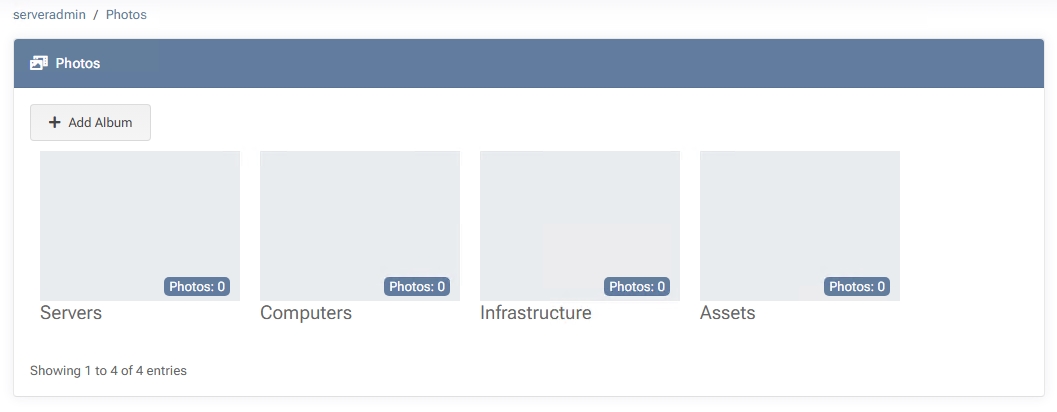
Default Albums
Upon opening Photos, you may see these four pre-created albums:
- Servers
- Computers
- Infrastructure
- Assets
You can edit or delete these default albums (unless restricted by policy) or add new ones to fit your organizational needs.
Creating a New Album
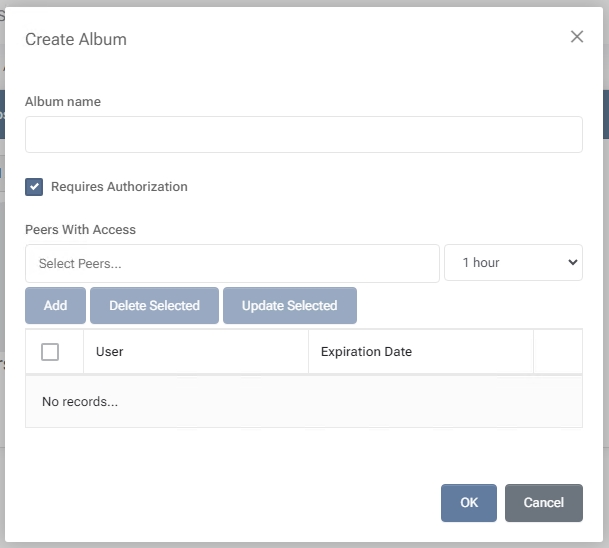
- Click “Add Album”
Opens a dialog where you can specify:
- Album Name – A descriptive title (e.g., “Project X Diagrams”).
- Requires Authorization – If enabled, the album is restricted to designated peers. They must explicitly authorize or be granted access.
- Peers With Access – Select peers or groups who can view the album. You can set an expiration date/time for temporary access.
- Click “OK”
Saves your new album, which now appears alongside any existing ones.
Adding and Managing Images
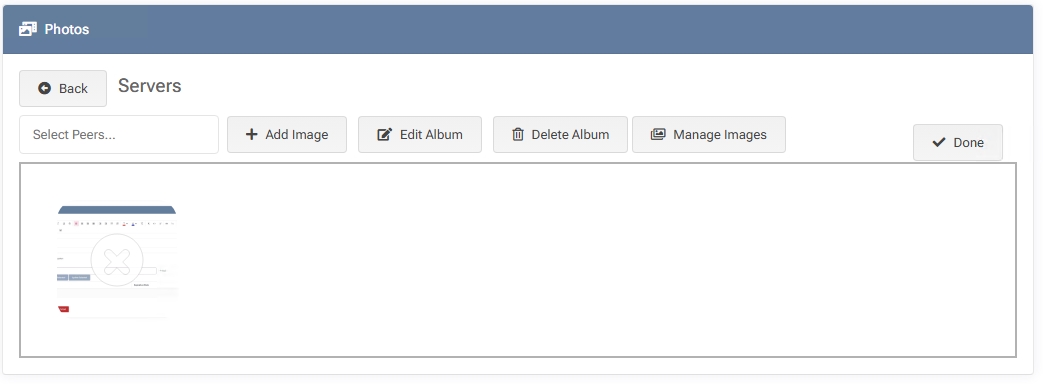
- Select an Album
Click on the album name (e.g., “Servers”) to open it.
- Add Images
Drag and drop files into the “Drop files here to upload” area, or use the Add Image button
to browse and select images from your computer.
- Manage Images
The Manage Images button (if visible) may let you reorder or remove images in bulk,
depending on your MSPControl version or configuration.
- Edit Album
Change the album name or toggle the Requires Authorization setting if you need to restrict or relax access.
- Delete Album
Permanently removes the album and any images it contains. This action cannot be undone, so proceed with caution.
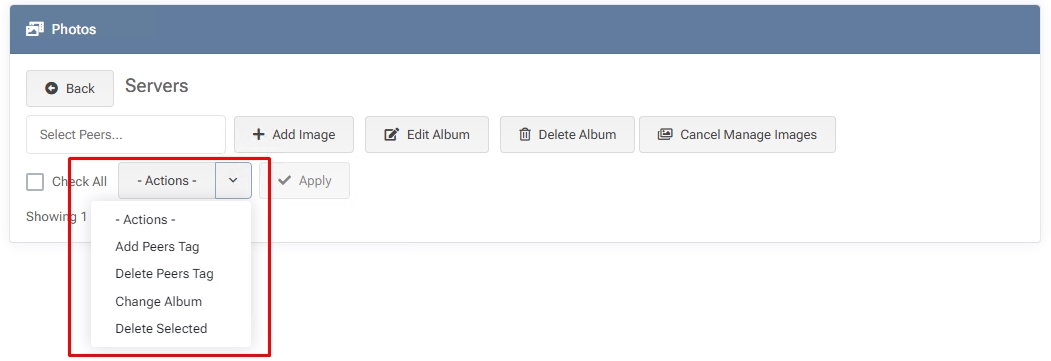
Mass Image Management
When viewing an album, you can select one or more images (using checkboxes) and then use the
-Actions- dropdown for bulk operations:
- Add Peers Tag – Assigns a peer tag to the selected images.
- Delete Peers Tag – Removes an existing peer tag from the selected images.
- Change Album – Moves the selected images to a different album.
- Delete Selected – Permanently removes the selected images from the system. This action cannot be undone.
Peer-Based Access and Authorization
- Each album can have Requires Authorization enabled, prompting any viewer to have explicit permission.
- You can grant access to peers by selecting them under Peers With Access when creating or editing an album.
- You can also specify an expiration date for temporary access—useful for short-term projects or collaboration.
To adjust permissions on an existing album, select the album and click Edit Album or
use the Select Peers… button if available. From there, you can add or remove peers,
or update access durations.
Best Practices
- Use Descriptive Album Names – Clear album titles (e.g., “Branch Office Wiring Photos”) help you and your peers quickly identify relevant images.
- Enable Authorization for Sensitive Content – If photos contain confidential data (e.g., server rack layouts, whiteboard plans), enable Requires Authorization and limit access to specific peers.
- Regularly Clean Up Albums – Remove outdated or unnecessary images to keep your photo library organized and storage usage in check.
- Leverage Peer Access Expiration – For time-bound collaborations, set an expiration date so that peers lose access once a project concludes.
