Documentation Policies
The Documentation Policies section in MSPControl provides rules and controls for managing documentation within the system. These settings define how users can organize and secure documents, assets, notes, photos, and stored passwords, ensuring structured access, compliance, and security.
Table of Contents
Authorizer Policy
The Authorizer Policy defines how authorization for documentation access and actions is managed. It allows administrators to designate authorizers, set access validity periods, and configure approval workflows.
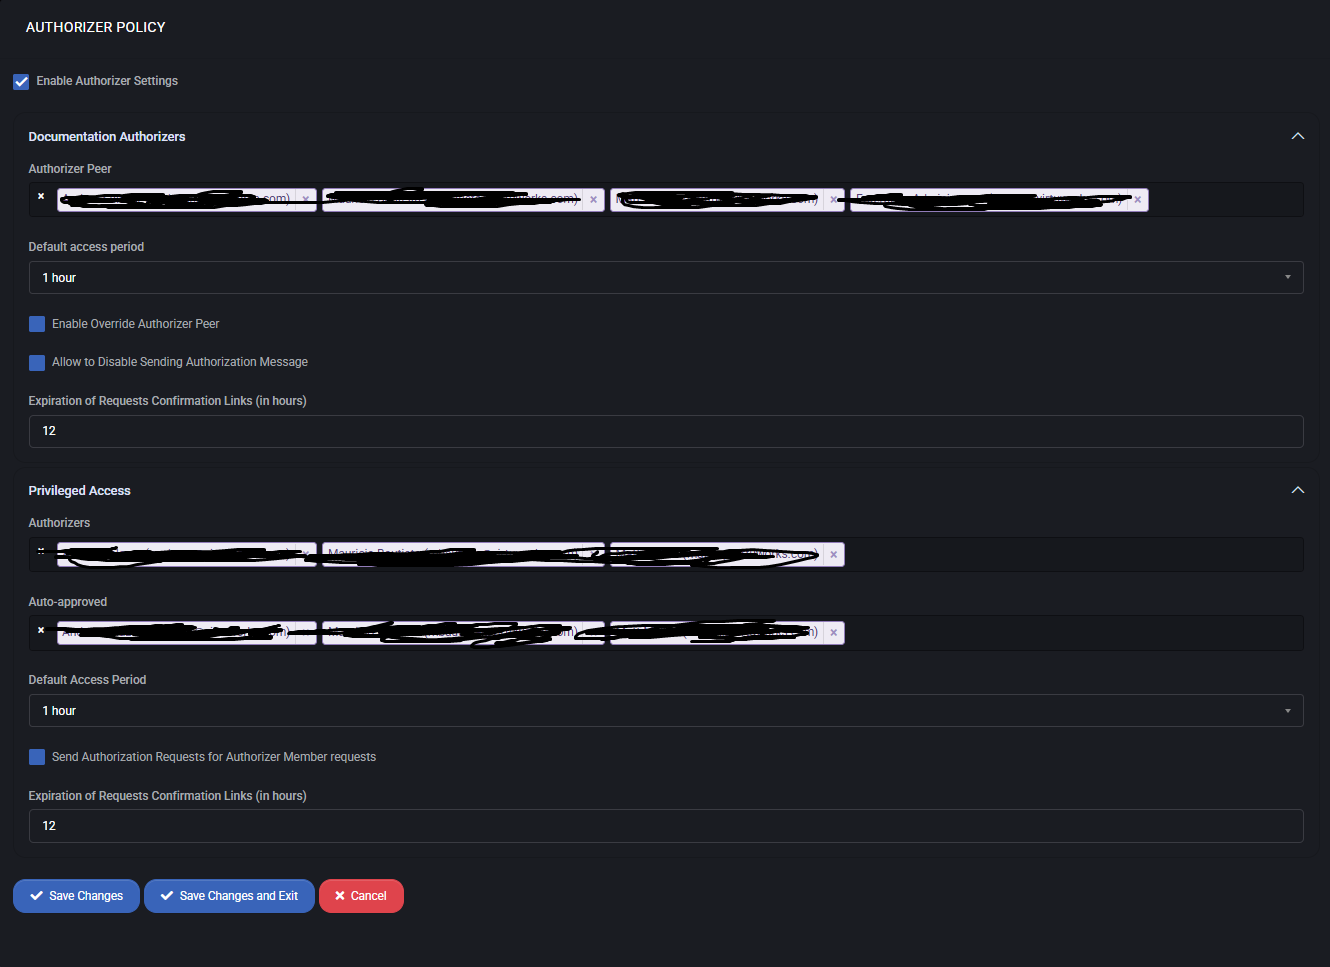
- Enable Authorizer Settings – activates the policy for documentation authorization.
- Documentation Authorizers – defines the list of users who can approve or reject authorization requests.
- Default Access Period – determines how long an authorization remains valid.
- Enable Override Authorizer Peer – allows a designated peer to override the original authorizer.
- Allow to Disable Sending Authorization Message – provides flexibility to mute authorization notifications.
- Expiration of Requests Confirmation Links (in hours) – sets how long confirmation links remain active.
Privileged Access
Privileged Access provides an additional layer of authorization with stricter control for sensitive resources.
- Authorizers – users authorized to validate privileged access requests.
- Auto-approved – list of users or groups whose requests are automatically approved.
- Default Access Period – defines how long privileged access remains valid.
- Send Authorization Requests for Authorizer Member requests – ensures requests from members are properly validated before access is granted.
- Expiration of Requests Confirmation Links – time limit for confirmation link validity.
Best Practices
- Assign multiple authorizers to ensure redundancy and availability.
- Use shorter expiration times for sensitive documentation to reduce risks.
- Leverage privileged access only for critical data and workflows.
- Review and update the list of auto-approved users regularly.
Notes Policy
The Notes Policy defines whether users can create and manage notes within the documentation system. Notes provide a simple way to attach additional context, reminders, or commentary to documentation items.
- Enable Notes – activates the ability to create and store notes associated with documents or assets.
Best Practices
- Encourage users to keep notes concise and relevant to the associated item.
- Use notes to track decisions, changes, or additional details that do not fit into structured fields.
- Regularly review notes to ensure they remain accurate and up to date.
Photos Policy
The Photos Policy controls how images are stored and organized within the platform.
This feature allows users to upload and categorize photos that relate to assets, infrastructure, or other managed items.
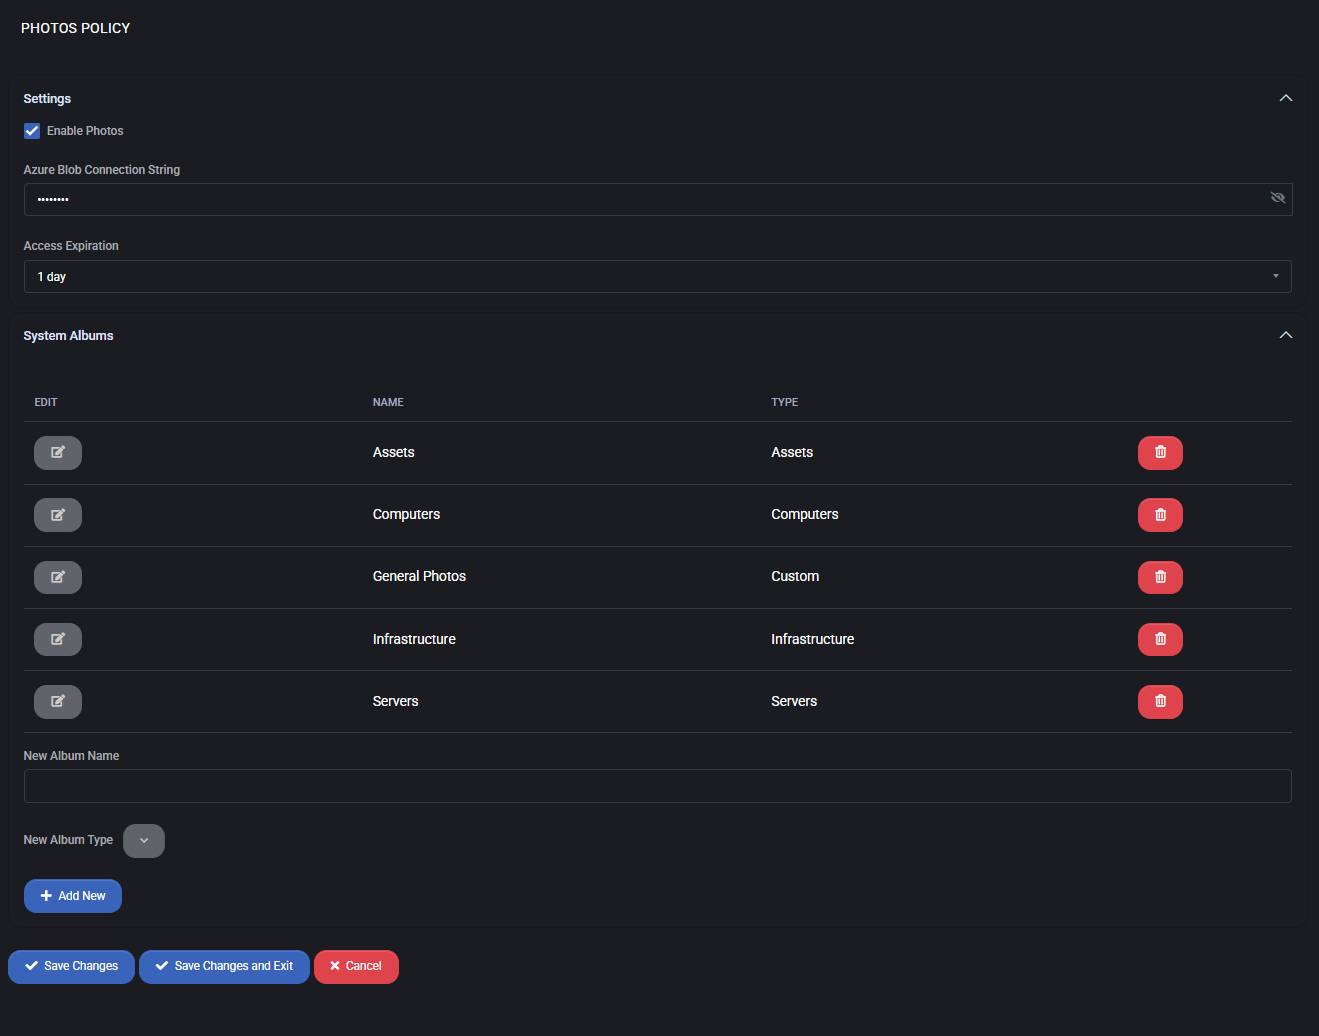
Photos Settings
- Enable Photos – activates the photo management functionality.
- Azure Blob Connection String – defines the secure external storage location in Azure Blob Storage.
This is required to store photo data outside the local system.
- Access Expiration – sets the validity period of photo access links (e.g., 1 day).
Once expired, the link must be regenerated for access.
System Albums
The system includes predefined albums to organize uploaded photos. Each album can be managed (renamed, deleted, or expanded).
- Assets – photos of general assets.
- Computers – dedicated to computer-related hardware.
- General Photos – a flexible album for uncategorized content.
- Infrastructure – network, facilities, and infrastructure-related photos.
- Servers – photos of physical and virtual servers.
Administrators can also create new albums by specifying a Name and selecting one of the available types:
Custom, Servers, Computers, Infrastructure, Assets.
Best Practices
- Use Azure Blob credentials with limited permissions for security.
- Review and clean up albums periodically to maintain organization.
- Configure access expiration times that balance security with user convenience.
- Apply Custom album types for temporary or project-specific use cases.
Password Manager Policy
The Password Manager Policy defines how credentials and certificates are securely stored, accessed, and shared within the system.
All sensitive data is stored in Azure Key Vault, ensuring enterprise-grade security, compliance, and access management.
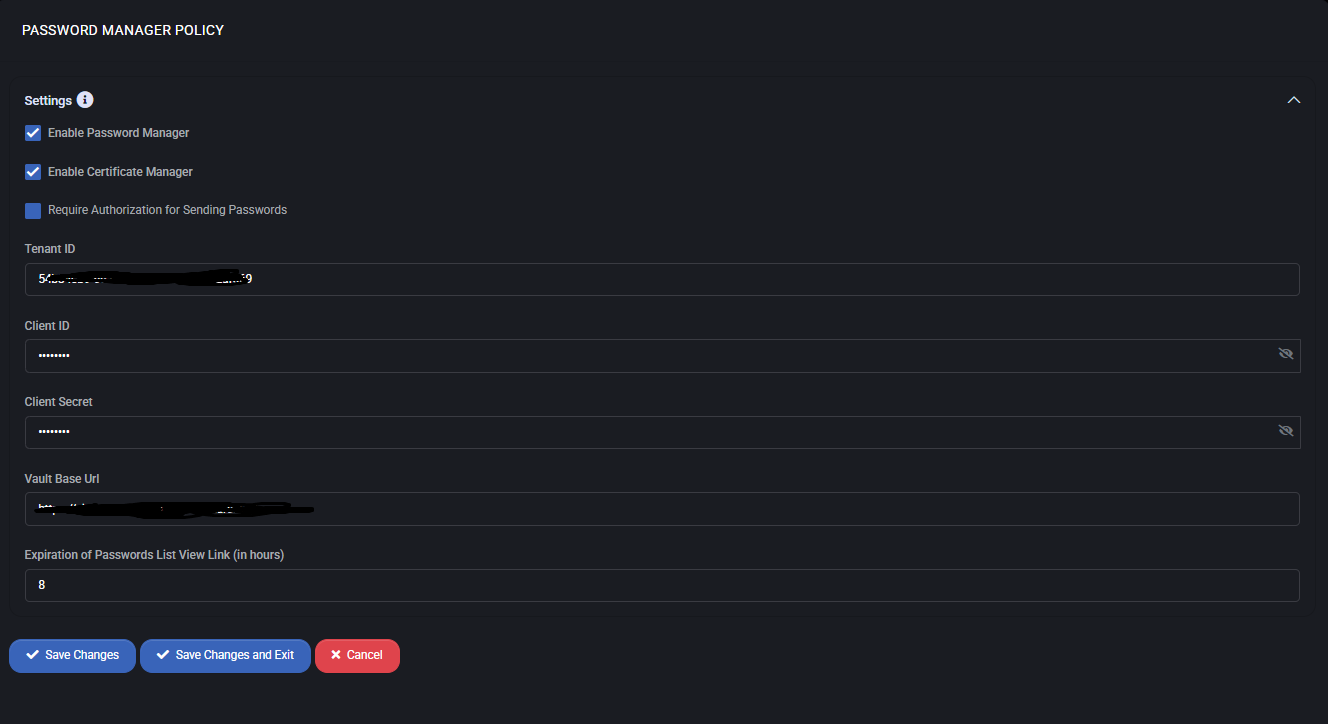
Settings
- Enable Password Manager – activates the password management feature with Azure Key Vault integration.
- Enable Certificate Manager – allows secure storage and management of digital certificates in the vault.
- Require Authorization for Sending Passwords – if enabled, an additional approval step is required before credentials can be sent or shared.
Configuration Fields
- Tenant ID – identifies the Azure AD tenant used for vault access.
- Client ID – Azure application ID for authenticating requests to the vault.
- Client Secret – secure key associated with the Azure application for API authentication.
- Vault Base URL – the root URL of the Azure Key Vault instance where passwords and certificates are stored.
- Expiration of Passwords List View Link (in hours) – determines how long shared password list links remain valid before requiring regeneration.
Best Practices
- Always store credentials and certificates in Azure Key Vault for maximum security and compliance.
- Use Azure AD role-based access control (RBAC) to manage who can access or share passwords.
- Set short expiration periods (e.g., 8 hours) for shared links to minimize risk exposure.
- Require authorization for sending passwords in environments with strict regulatory or compliance requirements.
Asset Manager Policy
The Asset Manager Policy defines how customers can organize and categorize their assets within the system. Enabling this policy allows structured storage and easy retrieval of asset-related information.
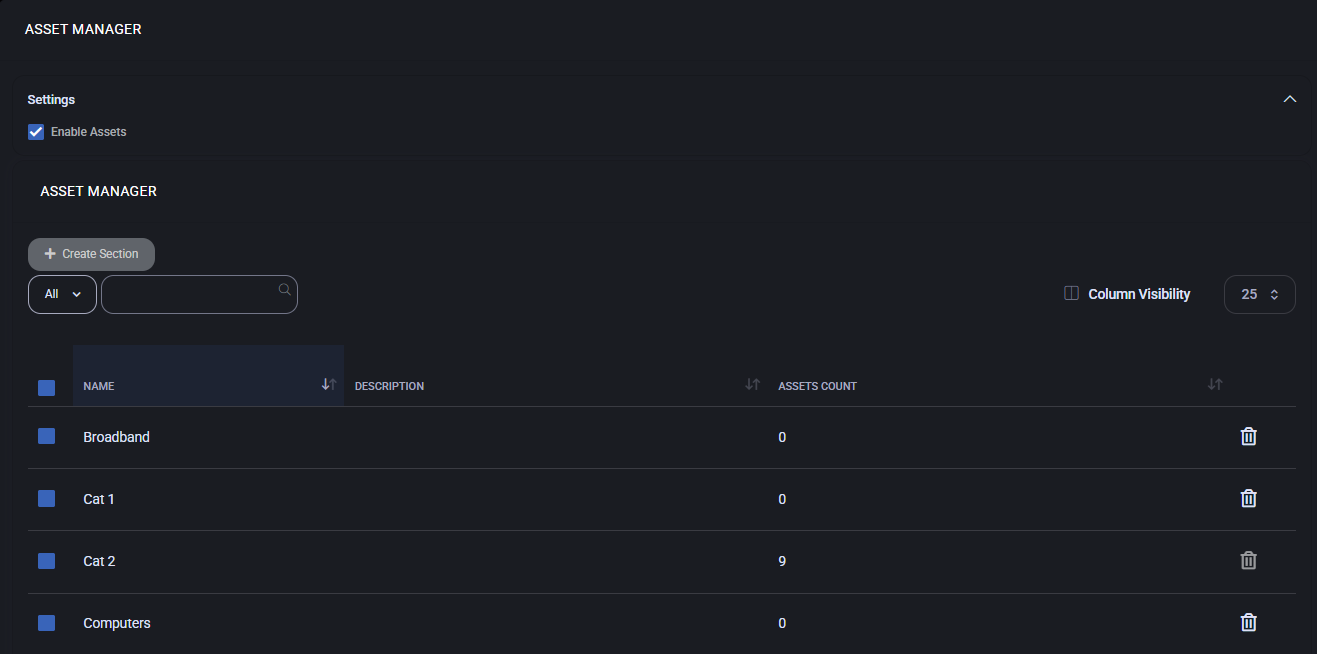
Enable Assets – activates the asset management module.
Asset Manager
Provides an overview of all configured asset sections. Each section groups related assets, such as hardware, infrastructure, or services, and displays the total asset count.
- Create Section – adds a new section for asset categorization.
- Name – the label of the asset section (e.g., “Computers,” “Broadband”).
- Description – additional details clarifying the purpose of the section.
- Assets Count – shows how many assets are currently assigned to that section.
- Delete – removes the section and its associated assets.
Add Section
This form allows administrators to create new asset categories.
- Name – required field for the section name.
- Description – optional explanation of the section’s purpose.
- Submit – saves the new section.
- Cancel – discards changes without creating a new section.
Best Practices
- Use clear section names for easy recognition (e.g., “Servers,” “Workstations,” “Networking”).
- Provide descriptions for complex or custom sections to improve clarity.
- Review asset counts regularly to ensure all resources are properly categorized.
- Delete unused or redundant sections to keep the asset manager clean and manageable.
Documents Policy
The Documents Policy defines how documents are stored, shared, and accessed within the system. This policy allows separation between customer-facing and server administrator documentation, while maintaining flexible permissions.
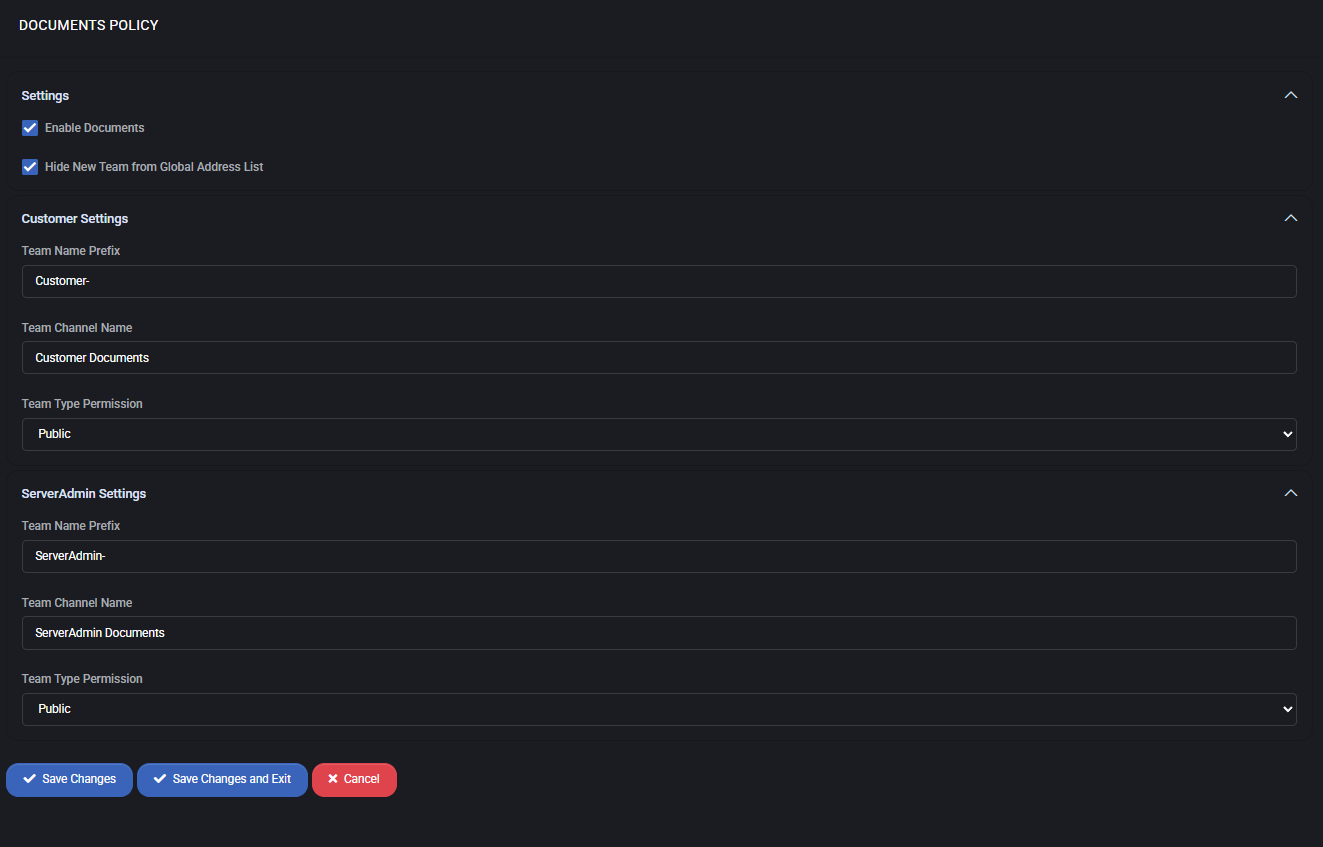
Settings
- Enable Documents – activates the documents module.
- Hide New Team from Global Address List – prevents newly created document teams from being visible in the global address book, improving confidentiality.
Customer Settings
- Team Name Prefix – automatically prepends a prefix to the customer team name (e.g.,
Customer-).
- Team Channel Name – default channel where customer documents are stored (e.g., “Customer Documents”).
- Team Type Permission – defines access scope (e.g., Public, Private).
ServerAdmin Settings
- Team Name Prefix – automatically prepends a prefix to the server admin team name (e.g.,
ServerAdmin-).
- Team Channel Name – default channel where administrative documents are stored (e.g., “ServerAdmin Documents”).
- Team Type Permission – defines access scope for administrative teams (e.g., Public, Private).
Best Practices
- Use clear prefixes to distinguish customer-facing documentation from administrative documentation.
- Keep customer document teams public only when transparency is required; otherwise, use private mode for sensitive content.
- Regularly review and adjust permissions to ensure correct visibility across customer and administrative documents.
- Leverage the “Hide from Global Address List” option for higher security in environments with strict privacy requirements.
