Certificates
The Certificates section in MSPControl allows you to securely store, manage, and share SSL or other types of certificates. Similar to Passwords, certificates are protected by Azure Key Vault, ensuring nothing is stored locally. You can optionally require authorization, control peer access, and even password-protect your certificates for additional security.
Enabling the Certificate Manager & Azure Key Vault
Before you can upload or manage certificates, you must enable the feature and configure Azure Key Vault:
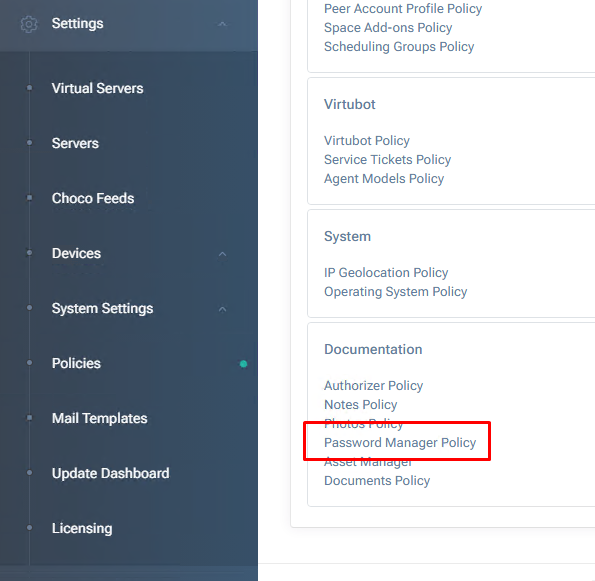
- Go to Settings > Policies > Documentation > Password Manager Policy
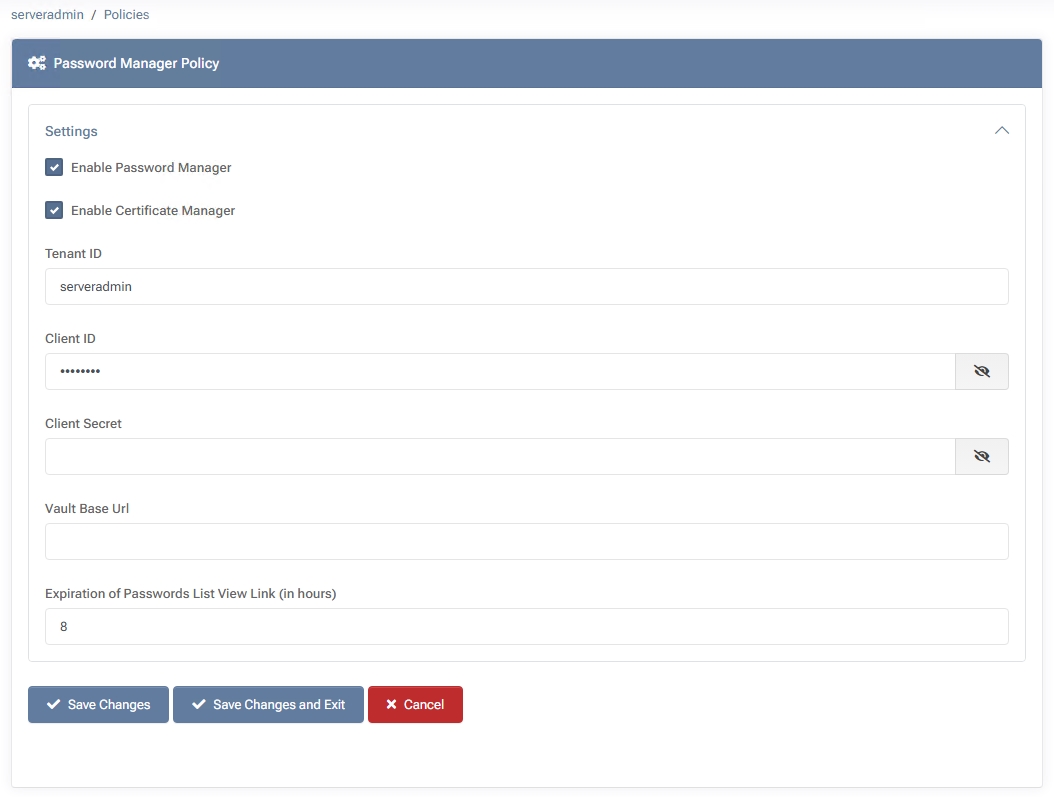
Check Enable Certificate Manager to activate certificate functionality.
- Enter Your Azure Key Vault Credentials
Provide the Tenant ID, Client ID, Client Secret, and Vault Base Url associated with your Azure Key Vault. MSPControl will use these details to securely store and retrieve certificates (as well as passwords, if enabled).
- Save Changes
Your configuration is now active. The Certificates section will appear in the
Documentation menu once enabled.
Without enabling Certificate Manager and providing valid Azure Key Vault credentials,
the Certificates functionality will be unavailable.
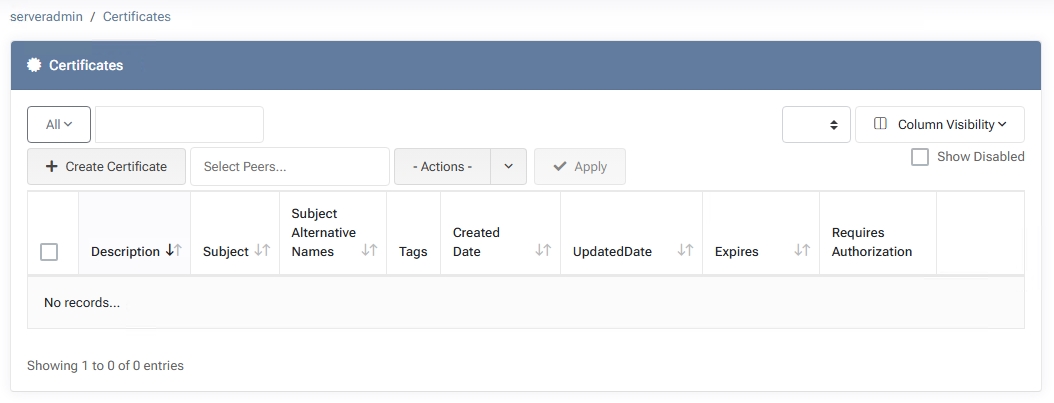
Overview
The main Certificates page lists your stored certificates, showing:
- Description – A short label or identifier (e.g., “Wildcard SSL for example.com”).
- Subject – The certificate’s primary domain name or common name.
- Subject Alternative Names – Any additional domains or SANs included in the certificate.
- Tags – Peer tags for categorizing or indicating ownership/relevance.
- Created Date / UpdatedDate – Timestamps for when the certificate was added or last modified.
- Expires – The certificate’s expiration date.
- Requires Authorization – Indicates whether extra authorization is required to view or export the certificate.
You can filter certificates by peers, tags, or use the Show Disabled checkbox to reveal
previously disabled certificates.
Creating a New Certificate
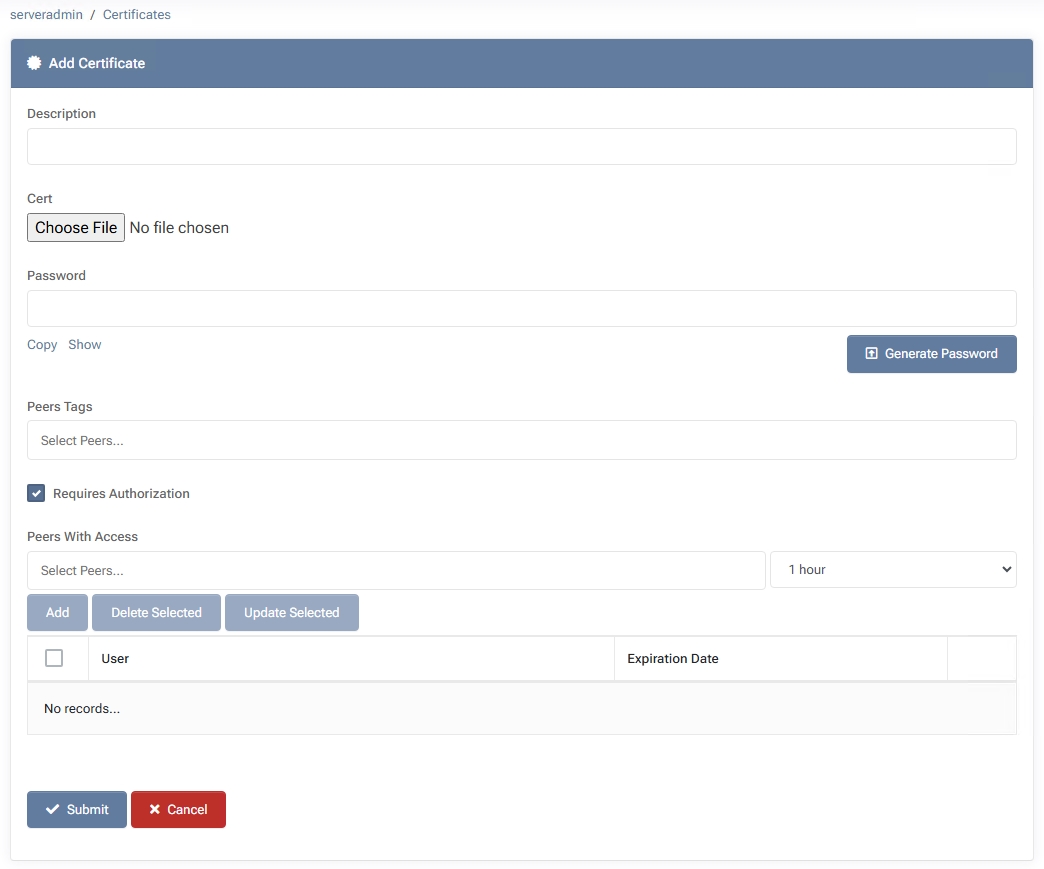
- Click “Create Certificate”
Opens a form to define the new certificate entry.
- Description
Provide a descriptive label (e.g., “Exchange Server 2025 SSL”).
- Cert
Upload the certificate file (e.g., .pfx or .p12) from your local machine. By default, MSPControl accepts Personal Information Exchange files (commonly .pfx or .p12), which bundle both the certificate and its private key.
- Password
If your certificate file is password-protected (e.g., .pfx with a private key), enter or generate that password here.
- Peers Tags
(Optional) Assign peer tags indicating who this certificate is for or relevant to.
- Requires Authorization
If enabled, only peers explicitly listed under “Peers With Access” can view this certificate.
- Peers With Access
Select peers who can access the certificate. You may also set an expiration date/time for temporary access.
- Submit
Saves your certificate, which appears in the list. Peer access and authorization requirements will govern who can view or manage it.
Actions on Existing Certificates
Select one or more certificates, then use the -Actions- dropdown to perform bulk operations:
- Set Requires Authorization – Toggles whether the selected certificates require extra authorization to view or export.
- Add Peers With Access – Grants specific peers or groups permission to manage the selected certificates.
- Delete Peers With Access – Removes previously granted access from chosen peers.
- Add Peers Tag – Assigns a peer tag (e.g., “Finance,” “DevOps”) to the selected certificates.
- Delete Peers Tag – Removes an existing peer tag from the selected certificates.
- Delete Selected – Permanently removes the selected certificates from MSPControl (and Azure Key Vault). This action cannot be undone.
Disabling vs. Deleting
Instead of deleting a certificate you no longer use, you can mark it as “disabled” (if supported in your version), preventing further use while preserving a record of it. Toggle Show Disabled to view or hide such certificates in the list.
Best Practices
- Maintain Accurate Descriptions – Use clear, descriptive names to easily identify each certificate’s purpose and domain coverage.
- Enable Authorization for Sensitive Certificates – If the certificate is critical (e.g.,
used for a production environment or a high-traffic site), require authorization to minimize unauthorized viewing.
- Review Access Periodically – Revisit who has access to important certificates and remove or disable certificates that are expired or no longer in use.
- Use Secure Passwords – For any private key or .pfx file, ensure the associated password is strong and stored safely. Consider generating a new password if it’s been compromised or widely shared.
