Assets
The Assets section allows customers to maintain a centralized inventory of physical and logical assets associated with their organization. Assets can represent hardware, peripherals, workstations, or any other tracked items and can be linked to users, locations, and devices for better visibility and control.
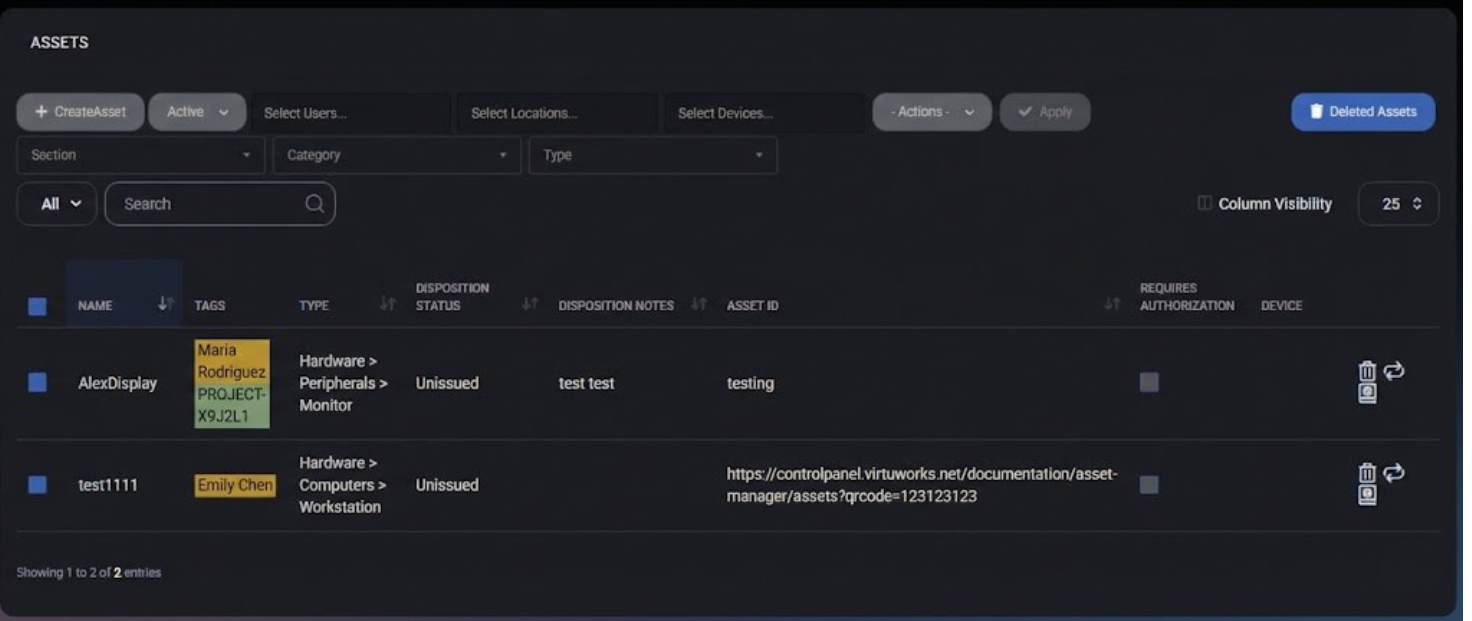
Table of Contents
Assets Overview
The Assets page provides a structured view of all assets registered for the customer organization. Each asset can be categorized, tagged, assigned, and tracked throughout its lifecycle using disposition statuses and notes.
Assets help improve inventory management, accountability, and auditability by clearly associating equipment with users, locations, or devices.
Assets List
The main Assets table displays all registered assets and supports filtering, searching, and bulk actions. The list may differ between customers depending on the assets created in their organization.
Displayed Columns
- Name – Asset name or identifier.
- Tags – User, location, or device tags assigned to the asset.
- Type – Asset classification (for example: Hardware > Computers > Workstation).
- Disposition Status – Current lifecycle state (for example: Unissued).
- Disposition Notes – Optional notes describing the asset state.
- Asset ID – Internal or external asset identifier.
- Requires Authorization – Indicates whether authorization is required for the asset.
- Device – Linked device, if applicable.
Standard table controls such as Search, Filters, Column Visibility, and Pagination are available to help navigate large inventories.
Asset Actions
Each asset row provides a set of action icons displayed to the right of the asset name. These actions allow basic asset management without opening the full edit form.
- Delete Asset (trash icon) – Permanently removes the asset from the inventory.
- Replace Asset (refresh icon) – Replaces the existing asset while preserving historical context where applicable.
- Logs (book icon) – Opens the asset activity log, displaying historical changes and events related to the asset.
Bulk actions are available through the Actions dropdown, allowing mass updates or deletions for selected assets.
Create Asset
The Create Asset form is used to register a new asset within the customer organization. It allows defining identification details, classification, ownership context, lifecycle state, authorization requirements, and related attachments.
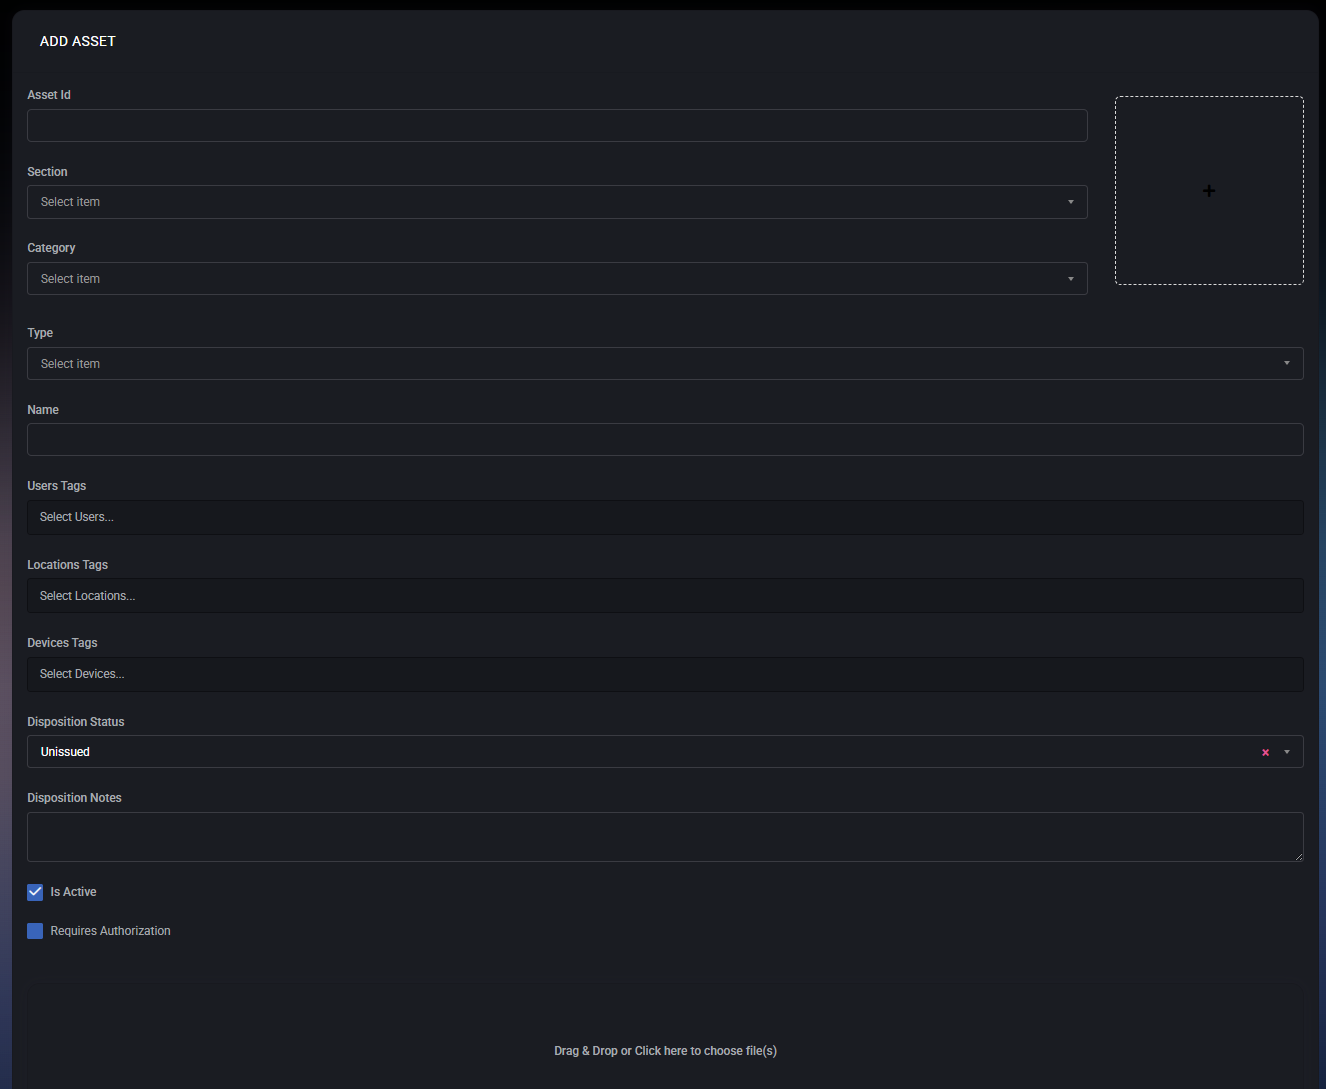
Asset Identification
- Asset ID – A unique identifier for the asset. This can be an internal inventory number, serial number, QR code value, or any custom identifier used by the organization.
- Name – A human-readable asset name. This is the primary label shown in the Assets list.
Classification
- Section – High-level grouping of the asset (for example: Hardware, Software, Furniture). Sections help organize assets by major categories.
- Category – A sub-classification within the selected section (for example: Computers, Peripherals).
- Type – Specific asset type within the category (for example: Workstation, Monitor, Laptop).
The available Category and Type options depend on the selected Section.
Tag Associations
Assets can be linked to organizational context using tags. These associations improve visibility and allow filtering across different modules.
- User Tags – Links the asset to one or more users (for example, the employee assigned to the device).
- Location Tags – Associates the asset with a physical or logical location (office, site, department).
- Device Tags – Connects the asset to managed devices when applicable.
Disposition Management
- Disposition Status – Defines the current lifecycle state of the asset. Common statuses include Unissued, Issued, Returned, or Retired.
- Disposition Notes – Free-text field used to describe the asset condition, assignment context, or any lifecycle-related notes.
Authorization & Activity
- Is Active – Determines whether the asset is active and visible in the system. Inactive assets remain stored but are excluded from active workflows.
- Requires Authorization – When enabled, additional authorization may be required before the asset can be issued, modified, or used in related processes.
Attachments
Files can be attached to an asset by dragging and dropping or clicking the upload area.
- Purchase documents
- Warranty files
- Photos
- Invoices or contracts
Saving Options
- Save Changes – Saves the asset and keeps the form open for further editing.
- Save Changes and Exit – Saves the asset and returns to the Assets list.
- Cancel – Discards all changes and exits the asset creation form.
Asset: Edit Asset
The Edit Asset page provides full lifecycle management for an individual asset. It is organized into multiple tabs, allowing administrators and authorized customer users to manage identification data, security-related information, attachments, relationships, and audit history in a structured way.
Asset: Edit Tabs
General
The General tab is the primary configuration area for an asset. It defines the asset’s identity, classification, ownership context, operational state, and key technical attributes. Most core asset metadata is managed from this tab.
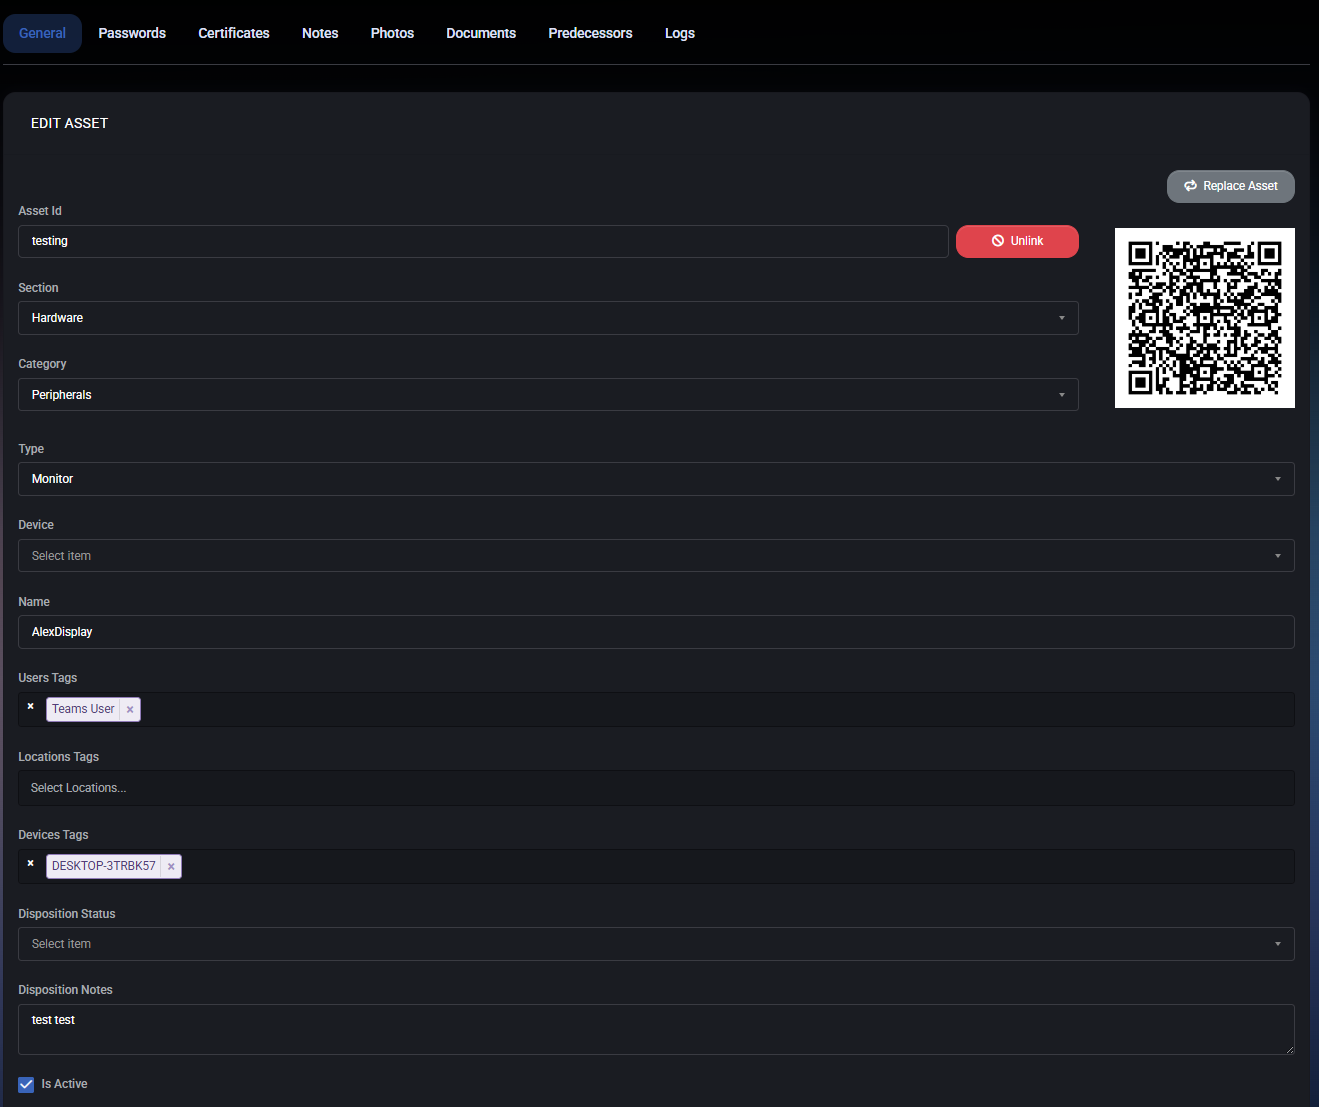
Asset Identification
- Asset ID – A unique identifier for the asset. This value is used for internal referencing, QR code generation, and direct asset access links.
- QR Code – A dynamically generated QR code linked to the asset. It can be scanned to quickly identify or retrieve asset information.
- Replace Asset – Allows replacing the physical asset while preserving its logical identity and history.
- Unlink – Detaches the asset from its current association (for example, device or ownership binding) without deleting it.
Classification
- Section – Defines the high-level asset category (for example: Hardware, Software, or Other).
- Category – Narrows the asset classification within the selected section (for example: Peripherals, Computers, Network).
- Type – Specifies the exact asset type (for example: Monitor, Workstation, Laptop). The selected type determines which additional properties are shown below.
Assignment & Context
- Device – Optionally links the asset to a specific managed device, enabling contextual tracking and correlation.
- Name – A human-readable name for the asset, typically used in lists and reports.
- User Tags – Tags associated with users (for example, assigned employee or role). These tags help group and filter assets.
- Location Tags – Identifies where the asset is physically located (office, site, department).
- Device Tags – Links the asset to device-related tags for automation, reporting, or policy-based actions.
Operational State
- Disposition Status – Indicates the current lifecycle state of the asset (for example: Unissued, Issued, In Repair, Retired).
- Disposition Notes – Free-text notes describing the asset’s condition, usage context, or lifecycle decisions.
- Is Active – Determines whether the asset is active and included in operational workflows.
- Requires Authorization – If enabled, actions involving this asset require explicit authorization.
Technical Properties (Type-Specific)
Depending on the selected asset type, additional mandatory or optional fields appear. For example, a Monitor asset may include:
- Manufacturer
- Model Name
- Manufacturer Serial
- Display Size
- Resolution
- Display Technology
- Hardware Interfaces (HDMI, DisplayPort, USB-C, VGA)
- Refresh Rate
- Asset Value
- Warranty End Date
Best Practices
- Always define Section, Category, and Type accurately to ensure correct property visibility.
- Use Tags consistently to enable powerful filtering and reporting.
- Keep Disposition Status up to date to reflect the real lifecycle stage of the asset.
- Attach assets to Devices where applicable to improve traceability.
- Use QR codes for fast physical asset identification during audits.
Passwords
The Passwords tab within an asset is used to securely store and manage credentials related to the selected asset. This may include local device passwords, service credentials, application logins, or MFA secrets associated with the asset. All passwords are stored securely and can be protected with additional authorization controls.
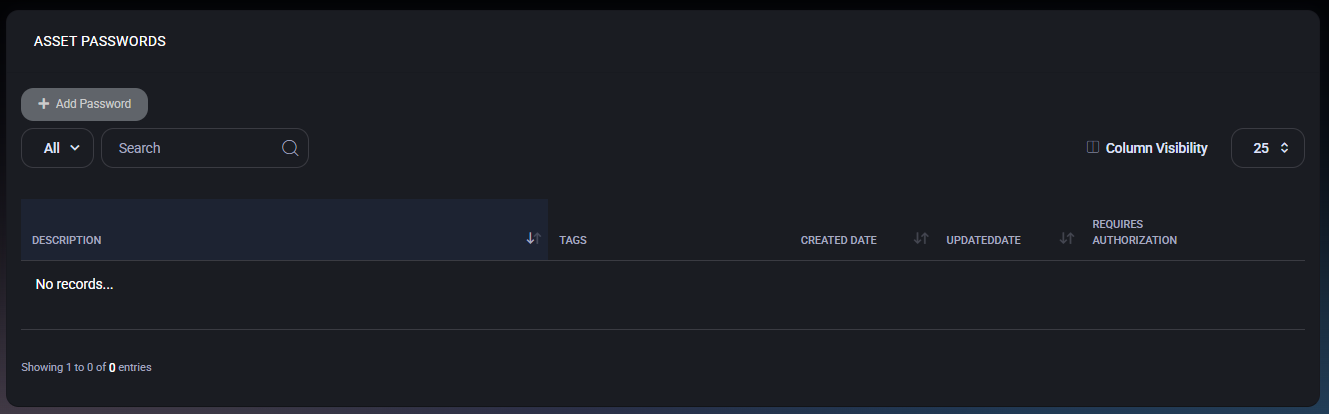
Passwords List
The main view displays a table of all passwords linked to the asset. If no passwords exist, the list will be empty.
- Description – A human-readable description of what the password is used for (for example: Local Admin Password or Printer Web Interface).
- Tags – Tags applied to the password for filtering and access scoping (users, locations, devices, or assets).
- Created Date – Date when the password entry was created.
- Updated Date – Date of the last modification.
- Requires Authorization – Indicates whether additional authorization is required to view this password.
The toolbar provides filtering, search, and column visibility options to quickly locate specific password entries.
Create Password
Click Add Password to open the password creation dialog. This dialog allows you to securely define and scope a new password entry.
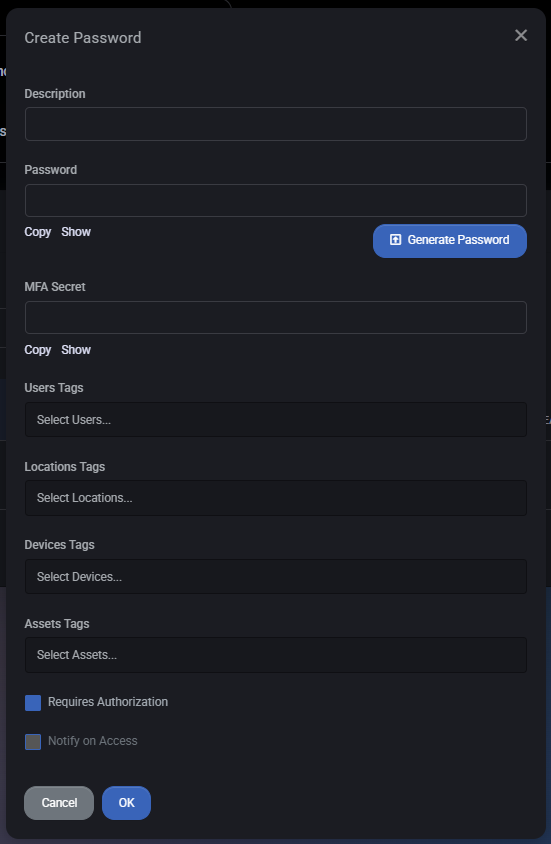
Fields
- Description – Short explanation of what the password is used for. This helps distinguish between multiple credentials.
- Password – The actual secret value. You can manually enter a password or use the Generate Password button to create a strong password automatically. Copy and Show options allow controlled access to the value.
- MFA Secret – Optional field for storing an MFA or TOTP secret associated with this credential. Includes Copy and Show actions similar to the password field.
- User Tags – Assign the password to specific users. Only tagged users will be able to discover or request access.
- Location Tags – Limit visibility based on physical or logical locations.
- Device Tags – Associate the password with specific devices.
- Asset Tags – Link the password to other related assets if needed.
- Requires Authorization – When enabled, users must go through an authorization workflow before the password can be revealed.
- Notify on Access – Sends a notification whenever this password is accessed, providing an audit trail and security visibility.
Actions
- OK – Saves the password entry.
- Cancel – Closes the dialog without saving.
Security Notes
- Use Requires Authorization for all sensitive credentials.
- Apply tags consistently to avoid over-exposing passwords.
- Enable Notify on Access for high-risk or privileged credentials.
- Store MFA secrets only when absolutely necessary and restrict access tightly.
Certificates
The Certificates tab allows you to securely store and manage digital certificates that are associated with a specific asset. This is typically used for SSL/TLS certificates, device certificates, or any other certificate material required for authentication, encryption, or secure communications related to the asset.
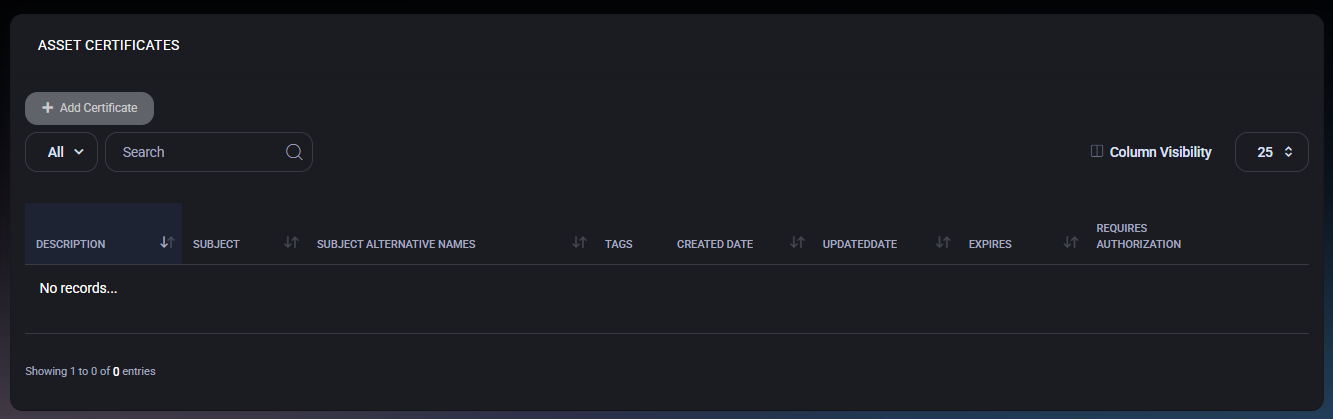
Certificates List
The main view displays all certificates linked to the asset in a structured table. If no certificates are present, the list will appear empty.
- Description – A human-readable description of the certificate (for example, its purpose or where it is used).
- Subject – The certificate subject, usually representing the entity the certificate was issued to.
- Subject Alternative Names – Additional DNS names or identities included in the certificate.
- Tags – User, location, device, or asset tags associated with the certificate.
- Created Date – The date the certificate was added to MSPControl.
- Updated Date – The last time the certificate record was modified.
- Expires – The certificate expiration date, useful for proactive renewal planning.
- Requires Authorization – Indicates whether special authorization is required to access this certificate.
Add Certificate
To attach a new certificate to the asset, click Add Certificate. This opens the certificate creation dialog.
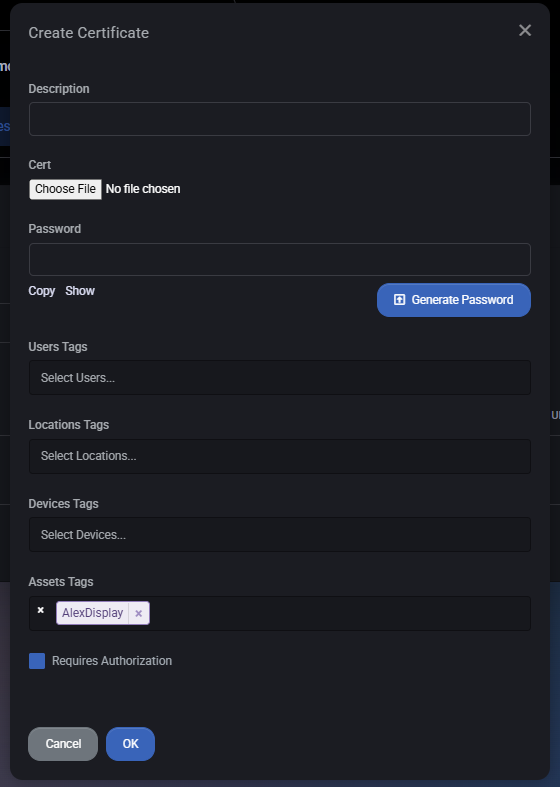
- Description – A short description explaining what the certificate is used for (for example: “SSL certificate for monitor management interface”).
- Cert – Upload the certificate file. This is typically a
.pfx, .p12, or other supported certificate format containing the certificate and private key.
- Password – If the certificate file is protected, provide the password here. The password can be entered manually or generated using the Generate Password button.
- User Tags – Associate the certificate with specific users. This helps control visibility and access.
- Location Tags – Link the certificate to one or more locations for organizational and filtering purposes.
- Device Tags – Bind the certificate to specific devices that use or depend on it.
- Asset Tags – Associate the certificate with one or more assets. By default, the current asset is selected.
- Requires Authorization – When enabled, access to this certificate requires additional authorization, adding an extra layer of security for sensitive certificates.
Security Considerations
- Always protect certificate files with strong passwords, especially if they contain private keys.
- Use Requires Authorization for certificates that grant elevated access or secure critical services.
- Regularly review the Expires column to avoid service disruptions caused by expired certificates.
- Use tags consistently to control access and simplify audits.
Notes
The Notes tab allows administrators and authorized users to store free-form textual information related to a specific asset. Notes are commonly used to document maintenance history, ownership details, configuration remarks, handover instructions, or any other contextual information that does not fit into structured asset fields.
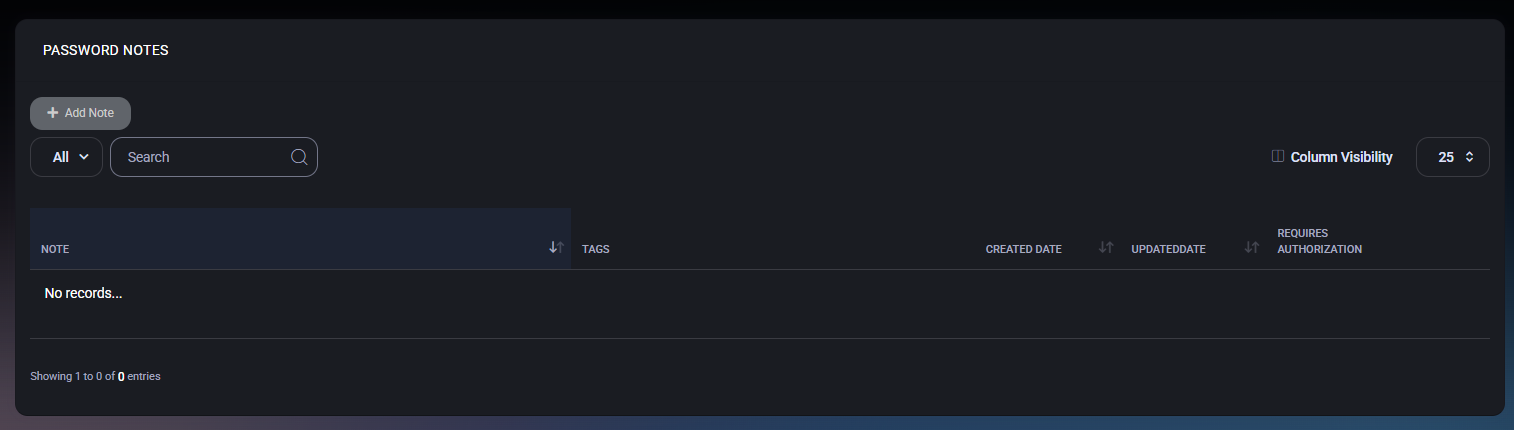
Notes List
The main view displays a list of all notes associated with the asset. If no notes exist, the table will show an empty state.
- Note – A preview of the note content.
- Tags – User, location, device, or asset tags assigned to the note.
- Created Date – Date when the note was created.
- Updated Date – Date of the last modification.
- Requires Authorization – Indicates whether additional authorization is required to view or modify the note.
Create Note
Click Add Note to create a new note for the asset. This opens the Create Note dialog.
Note Editor
The note content is entered using a rich text editor that supports formatting and structured content. Available editor features include:
- Bold, italic, underline, and strikethrough
- Text alignment and lists
- Font size and formatting blocks
- Links and basic text styling
Tagging
Notes can be associated with multiple contextual tags to improve visibility and access control:
- User Tags – Link the note to specific users.
- Location Tags – Associate the note with physical or logical locations.
- Device Tags – Reference related devices.
- Asset Tags – Link the note to one or more assets (including the current asset).
Authorization
The Requires Authorization option enforces additional access control for the note. When enabled, only users with sufficient privileges can view or modify the note content.
Actions
- OK – Saves the note and associates it with the asset.
- Cancel – Closes the dialog without saving changes.
Best Practices
- Use notes to capture information that may be useful for audits, troubleshooting, or asset lifecycle tracking.
- Apply tags consistently to improve filtering and contextual access.
- Enable Requires Authorization for sensitive operational or security-related notes.
- Keep notes concise and structured to maintain long-term readability.
Photos
This tab lets you attach images to the current asset record (for example: device photos, serial label pictures, invoices, delivery notes, or any other visual reference). Photos stay linked to the asset, so peers and administrators can quickly verify the asset condition and details without relying only on text fields.
Main Actions
- Add Image – Uploads one or more images to the asset. Clicking Add Image opens an upload area where you can drag and drop files or click to choose files from your computer.
- Delete Images – Removes selected images from the asset. Use this when outdated or incorrect images were uploaded (for example: asset replacement or wrong attachment).
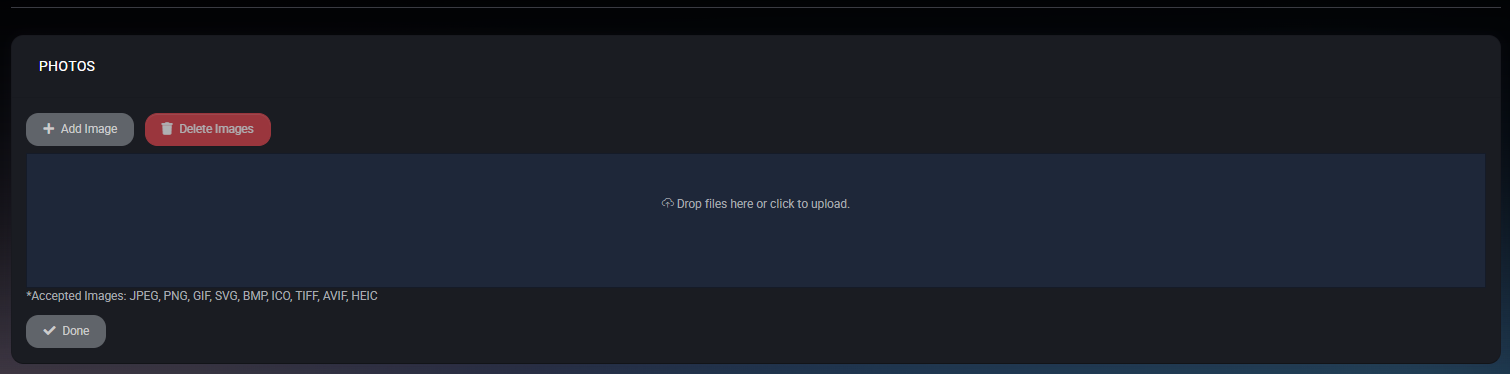
Upload Area (Add Image)
When adding images, MSPControl displays a dedicated upload panel:
- Drag & Drop or Click to Upload – Drop files into the highlighted area or click it to select files using the file picker.
- Accepted Image Formats – The upload panel lists the supported formats: JPEG, PNG, GIF, SVG, BMP, ICO, TIFF, AVIF, HEIC.
- Done – Closes the upload panel and returns you to the Photos tab after you finish attaching images.
Photos List
After uploading, the tab shows the images attached to this asset. If there are no photos yet, MSPControl shows an empty state (for example: No Images…), while still keeping Add Image available for the next upload.
Best Practices
- Add at least one clear photo of the asset label (serial/model) to speed up identification during audits and troubleshooting.
- Upload “before/after” photos when replacing or servicing equipment to keep a visual history in the asset record.
- Remove outdated photos after an asset replacement so the record remains accurate for anyone reviewing it later.
Documents
The Documents tab is used to store and manage files related to a specific asset. It allows attaching manuals, invoices, contracts, configuration files, or any other documentation that should be associated with the asset and easily accessible in one place.
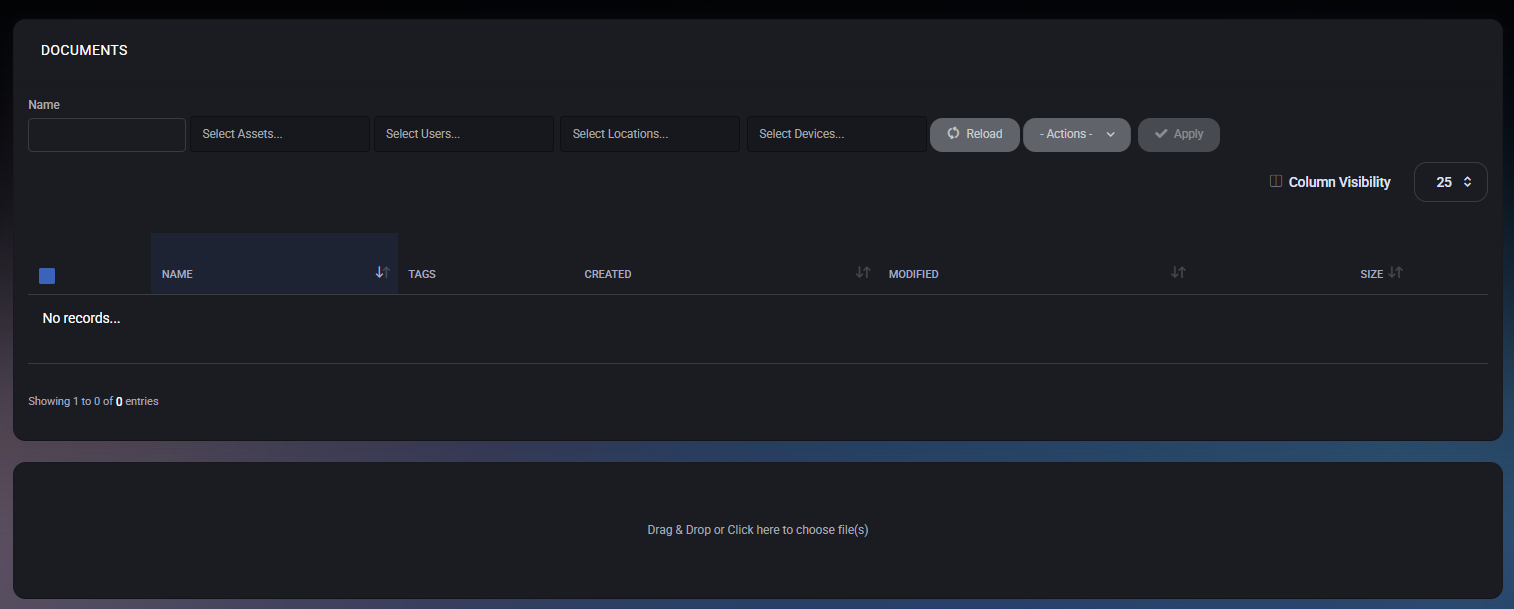
Documents List
The upper section displays a list of documents already linked to the asset. If no documents are attached, the list will show an empty state.
The list supports the following columns:
- Name – Document file name.
- Tags – Tags applied to the document for filtering and access control.
- Created – Date when the document was uploaded.
- Modified – Date of the last modification.
- Size – File size.
Filtering and Search
Above the document list, filtering options are available to help locate specific files:
- Name – Filter documents by file name.
- Select Assets – Filter by asset tags.
- Select Users – Filter documents assigned to specific users.
- Select Locations – Filter by location tags.
- Select Devices – Filter by device tags.
Bulk Actions
The Actions menu allows performing bulk operations on selected documents:
- Add Asset Tag
- Delete Asset Tag
- Add User Tag
- Delete User Tag
- Add Location Tag
- Delete Location Tag
- Add Device Tag
- Delete Device Tag
- Delete Selected
The Apply button executes the selected action on all checked documents.
Uploading Documents
The lower section of the page contains a file upload area. Documents can be added using one of the following methods:
- Drag and drop files into the upload area.
- Click the upload area to select files manually.
Uploaded documents are immediately associated with the current asset and become visible in the list above.
Column Visibility
The Column Visibility option allows customizing which columns are displayed in the documents table, helping adapt the view to operational needs.
Predecessors
The Predecessors tab provides a simple history view of assets that were linked as predecessors to the current asset. This is typically used to maintain an audit trail for replacements, upgrades, or lifecycle changes (for example, when one physical device replaced another).
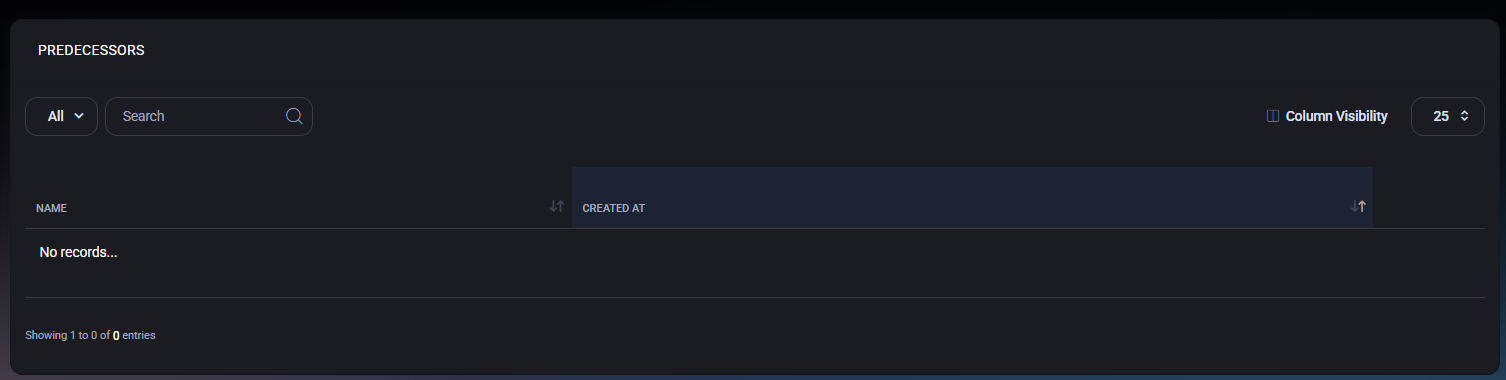
Predecessors List
This tab displays a table of predecessor records associated with the asset. If no predecessor relationships exist, the page will show an empty state.
The list includes the following columns:
- Name – The name of the predecessor asset.
- Created At – The date and time when the predecessor relationship was recorded.
Search and Filtering
- Filter – The dropdown (for example: All) allows switching between available views if configured in the environment.
- Search – Quickly find a predecessor by typing part of its name.
Column Visibility
Use Column Visibility to show or hide columns in the list depending on operational needs.
Logs
The Logs tab provides a detailed, read-only audit trail of all actions performed on the asset. It allows tracking the full lifecycle of the asset, including creation, updates, scans, tag changes, and other system or user-driven events.
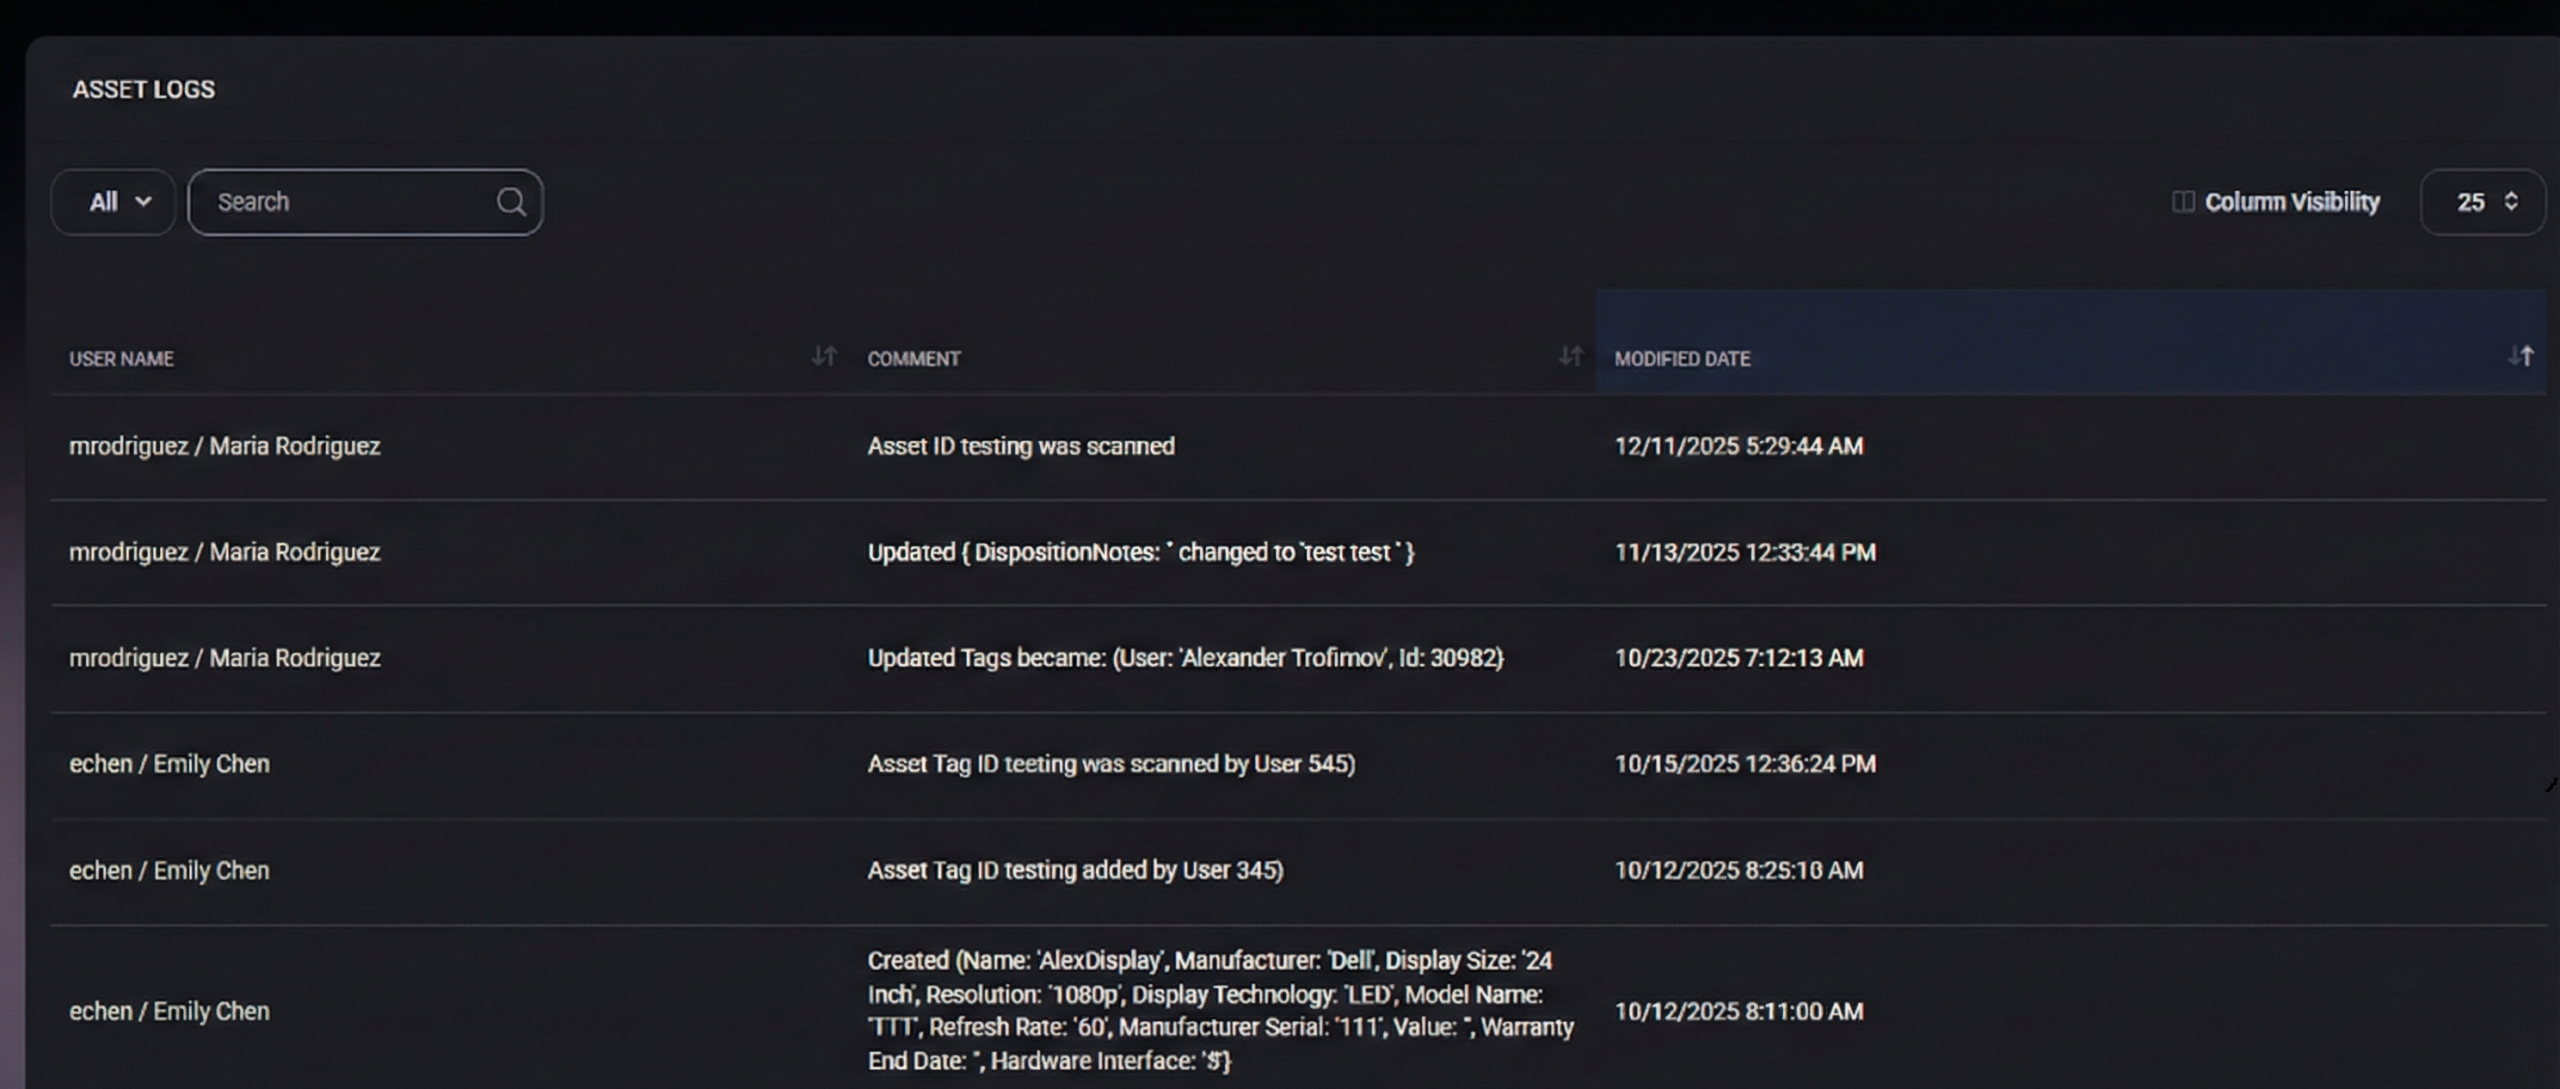
Logs List
This section displays a chronological list of log entries related to the asset. Each entry represents a single action or event.
The table includes the following columns:
- User Name – The user account that performed the action. Displayed in the format username / full name.
- Comment – A detailed description of the action that occurred. This may include:
- Asset creation events with initial property values
- Updates to asset fields (for example: disposition notes or tags)
- Asset tag scans
- Manual or automated system actions
- Modified Date – The exact date and time when the action was recorded.
Filtering and Search
- Filter – The dropdown (for example: All) allows switching between available log views if configured.
- Search – Enables quick searching through log comments and user names.
Column Visibility
Use Column Visibility to show or hide columns in the logs table, depending on auditing or reporting needs.
Audit and Compliance Notes
The Logs tab is strictly informational and cannot be edited. It serves as an immutable audit record, helping with compliance, troubleshooting, and historical analysis of asset changes.
